If you’ve been blogging on GrooveBlog’s sub-domain, you can now add your own branded domain to GrooveBlog!
In this article, I’m going to show you how to create a sub-domain and connect GrooveBlog to your own custom domain.
Now, I’m going cover 2 methods because you might have your DNS managed via Groovefunnels or Cloudflare.
If your on the paid plan, you can create unlimited GrooveBlogs and connect unlimited domains.
GrooveBlog Custom Domain Tutorial
Method 1: Connecting Your Custom Domain Through GrooveFunnels
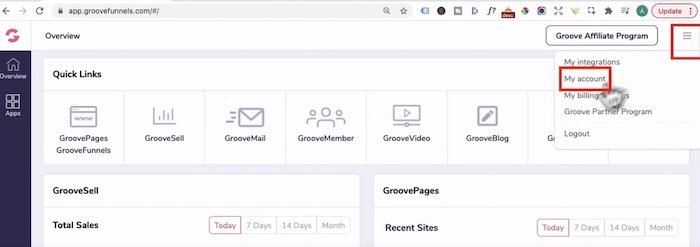
- Login to Groovefunnels
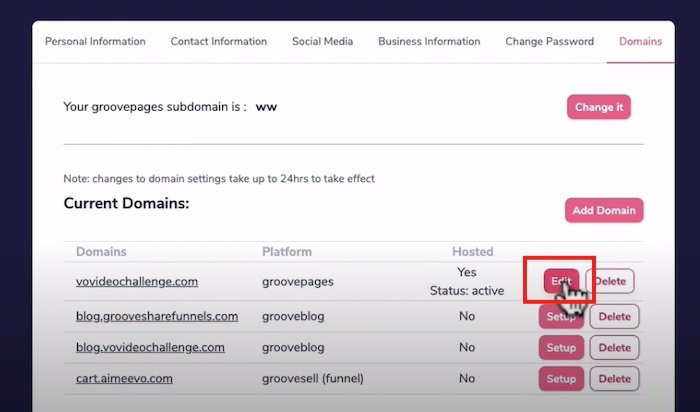
- Click on the hamburger icon, click my account and click on the “Domains” tab
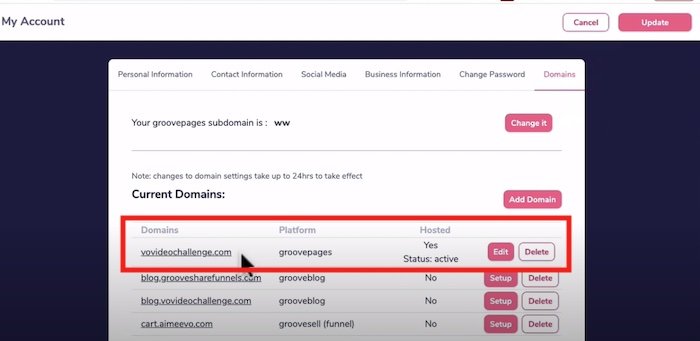
- In this example, my root domain which is vovideochallenge.com is it’s already added and hosted via groovefunnels as you can see here.
- Now if you don’t know how to setup your root domain to GrovePages, please read my GroovePages custom domain update article as I show you step-by-step on how to do this.
- Some people have reported that they couldn’t get their domain live. In that case, you will need to delete any unnecessary DNS records from your domain registry like godaddy or namecheap.
- Let’s say I want to add Grooveblog as a sub-domain to vovideochallenge.com
- So you would click “add domain”, in domain URL: add blog.yourdomain.com
- Under “which app would you like to use this url for?” select GrooveBlog
- Under “Would you like us to host your site for you?”, you would select “no thankyou” because you already have the root domain connected to GroovePages.

- Once you clicked save, you will be given the c name records so copy host10.groovepages.com
- Copy host10.groovepages.com on a notepad because you’ll need that later
- You can ignore “Make sure you enable flexible SSL on your domain” because it’s not required when your domains are hosted on GrooveFunnels
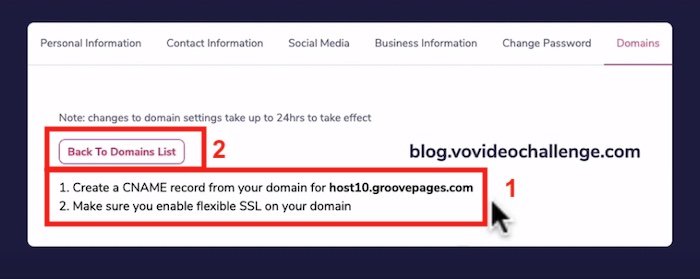
- Click “Back To domain List” button
- Now click on the root domain, click “edit” on the root domain
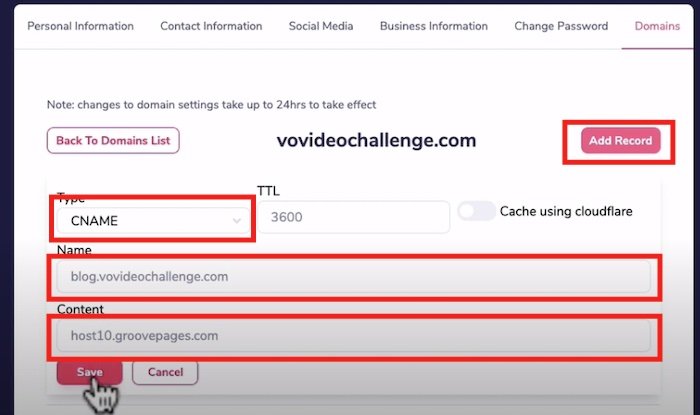
- Now you need to add a cname record that points to host10.groovepages.com.
- Click on “add record”:
- under type: select c name
- name: call it blog (which means your blog domain would be blog.yourdomain.com)
- content: pasted in host10.groovepages.com
- Press save
- Once you clicked save, you will be back to the domains list
- Under “proxy” click enable.
- Give it a few minutes then head to Grooveblog app
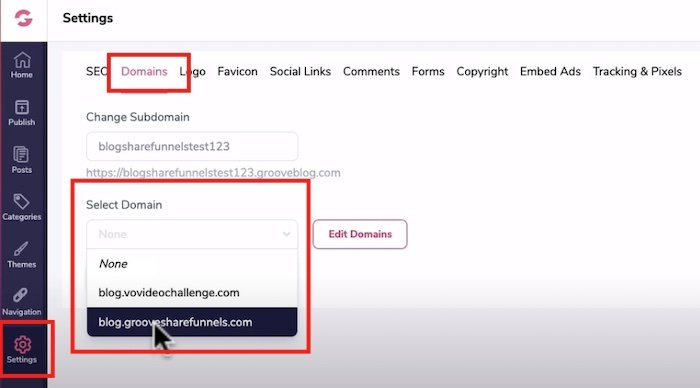
- Click on settings and Domains tab
- Under “Select domain”
- Your blog subdomain should be available for you to connect.

Method 2: Connecting Your Custom Domain Through Cloudflare
- You would still repeat the same process of adding blog.yourdomain.com
- So you would click “add domain”, in domain URL: add blog.yourdomain.com
- Under “which app would you like to use this url for?” select GrooveBlog
- Under “Would you like us to host your site for you?”, you would select “no thankyou” because your domain is managed via Cloudflare
- You would be given the c name records of host10.groovepages.com and enable Flexible SSL on Cloudflare
- Let’s login to Cloudflare
- Select the domain you want to add blog to.
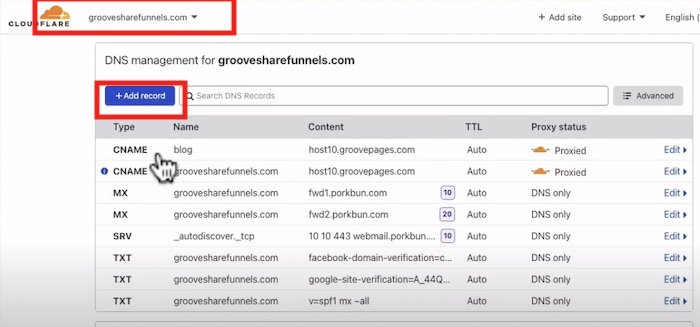
- Let’s choose groovesharefunnels.com from the drop down arrow
- Click on DNS tab
- Click +add record
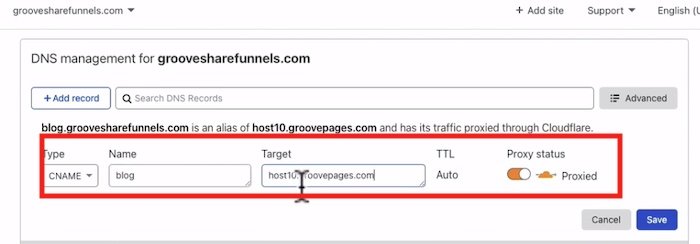
- When you click on +Add record, the below screenshot should pop.
- Type: cname,
- Under name: blog.groovesharefunnels.com so in your case it would be blog.yourdomain.com
- Under Target: paste in “host10.groovepages.com”
- Leave TTL to auto and proxied status to orange cloud
- Press Save.
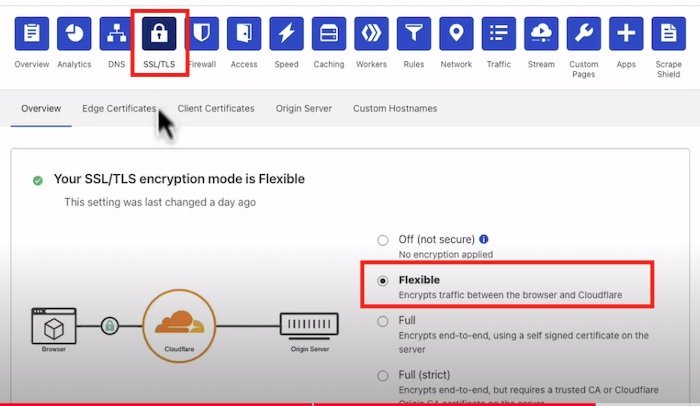
- Now in the instructions, Groove wanted you to enable Flexible SSL.
- Head back up top and click on SSL / TLS icon
- If you have it set to “full” then you would click “flexible:
Now with Cloudflare, it can take anywhere from a few minutes and up to 24 hours to connect to Groovefunnels servers so just double check that you have the domain names added correctly.
- login to Grooveblog
- Click on the “Settings” tab in GrooveBlog
- Under the domain tab, click on the “Select domain” drop down arrow and your blog subdomain should be available for you to connect