
This is the first part in the GrooveMail tutorial series for 2022.
Now, I’ve created a bunch of GrooveMail videos in 2021 which had the old interface….
So in this video I want to walk you through the updated process of:
1) Adding a From email address ie “Sender email”
2) Connecting an SMTP like Sendgrid and
3) Adding GrooveMail’s Webhook url to Sendgrid
This is essentially the first article you should be reading if you want to use GrooveMail.
And if you haven’t upgraded to Groove Lifetime yet, check out my $3000+ Groove bonuses below.
Connect Your Custom Domain To Groove First
Before we begin, I’m going to assume that you connected your branded domain to Groove.
If you haven’t done that yet please watch E48 Connect and publish a custom domain to Groove below:
Step 1: Add a Email Sender in GrooveMail
Once you’ve added your custom domain, log into GrooveMail and step one is adding a new sender email address.
- Head to the “Senders” icon, click on it and click on “Email sender”.
- Over to the right click on “new senders” (it’s a pink button)
Now with sender email addresses you won’t be able to use free email addresses like gmail.com yahoo.com or any website that provides a free email address.
The sender email address that you need to add here needs to be connected to your branded domain for example [email protected].
Which is why you needed to watch episode 48 Connect and publish a custom domain first.
Now Groove will cover hosting for your websites funnels and blogs but you’ll need to create your own branded email address and you’ve got two options here.
- Option one is going to google workspace and setting up a business email which is around five us dollars per month or
- Option two is creating your account through Zoho which allows you to create a free business email address.
I’ve already created this video on my channel it’s episode 51 create a free business email with Zoho (see video below):
There’s a few steps involved in setting up an email with Zoho so i highly suggest you watch the above video and follow along.
How To Add GrooveMail Email Sender Video Tutorial
Once you’ve got your business domain email set up and it can accept emails, then you can head back to GrooveMail and fill in these details.
- For sender identity this is just a name for your reference for example i can just add the domain that is associated with this sender email.
- For the sender name this is the from sender name, i’ll just add in my name.
- For sender email enter in your own email address, this needs to be an email you have access to because you’re going to receive a verification email from GrooveMail.
- For reply email just enter the same email
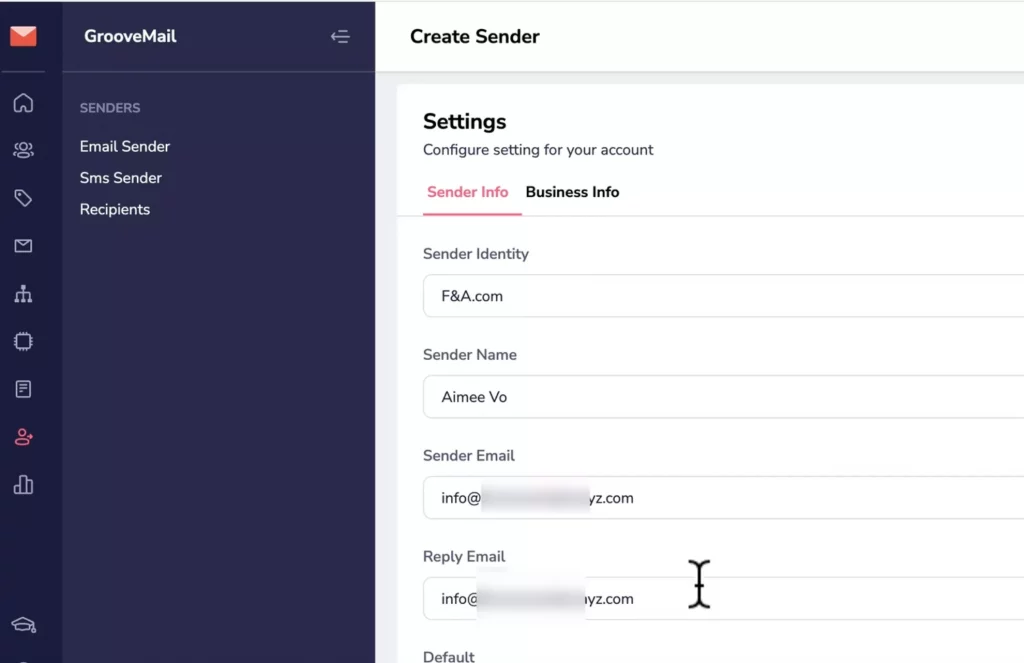
Over in the “business info” tab you can just enter in the company name and address for your email.
Step 2: Select SMTP Driver (Temporary)
We’ll switch back to “Sender info” and step 2 is selecting an smtp driver.
Now this is a temporary measure as Groove will have their own smtp which is coming soon.
Hopefully by the time you do this, all you need to do is just select “GrooveMail SMTP”.
Right now GrooveMail SMTP is inactive but when that is available and if you are a paid customer, you can just select “GrooveMail SMTP” and click save.
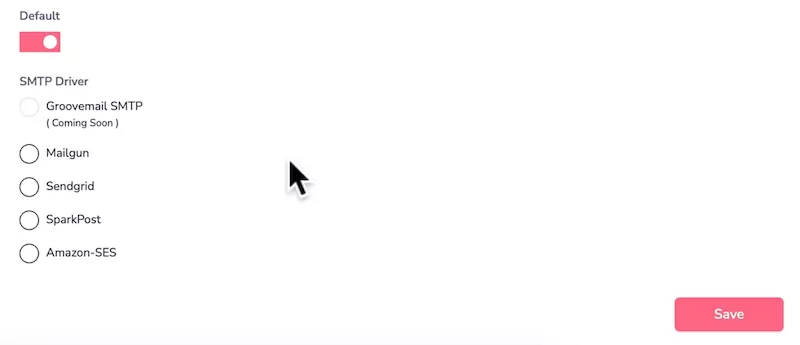
For the time being, you will need to add your own SMTP.
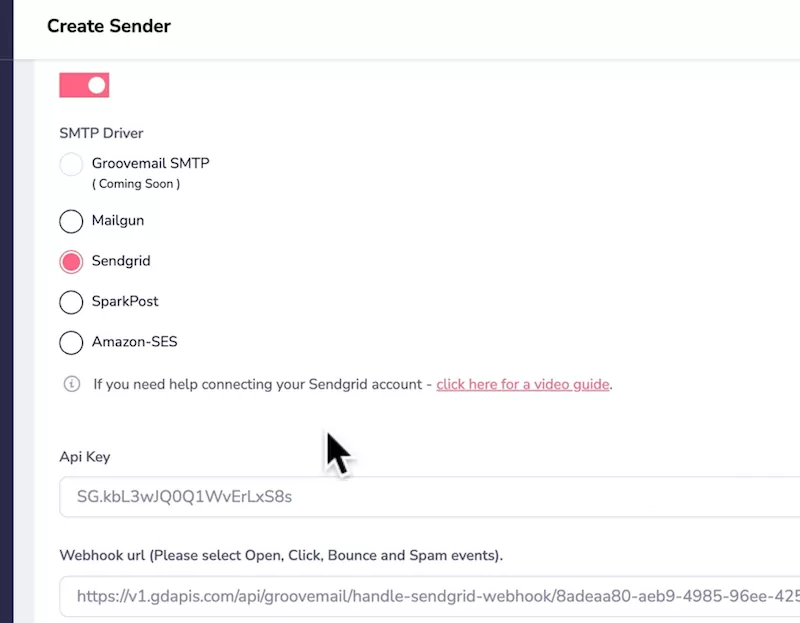
I recommend using Sendgrid which requires you to enter in an API key.
I’m going to walk you through the steps right now in getting that API because it can be a bit overwhelming.
Head to your browser and type in Sendgrid.com, there should be a button on the top right here in which you can get started.
Sign up and log into Sendgrid.
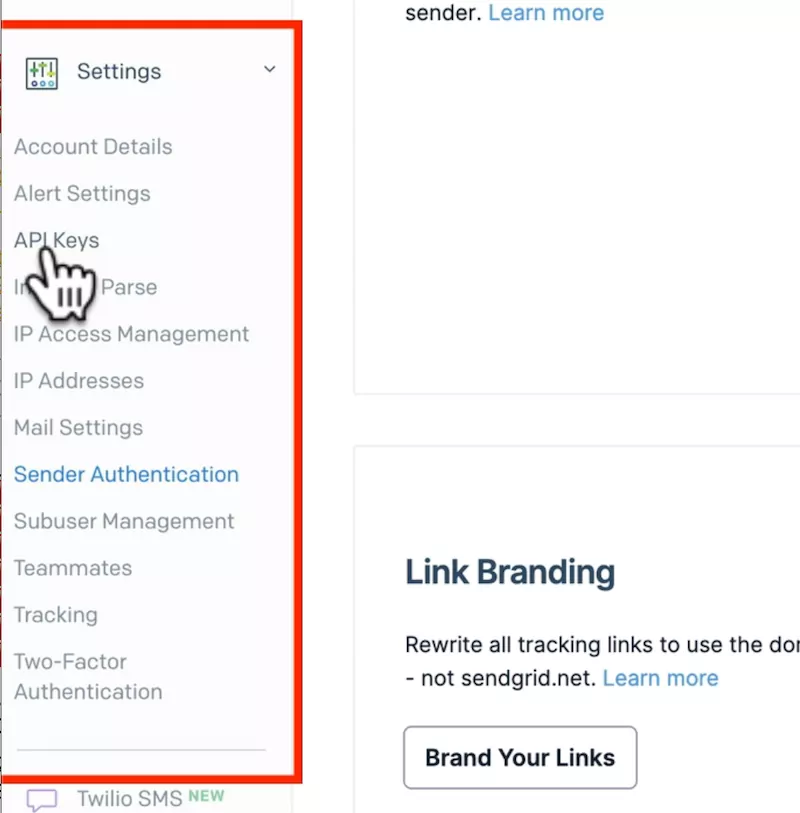
Over in the left hand side bar, scroll down click on “Settings” and you want to click on “Sender Authentication” in order to connect to Sendgrid.
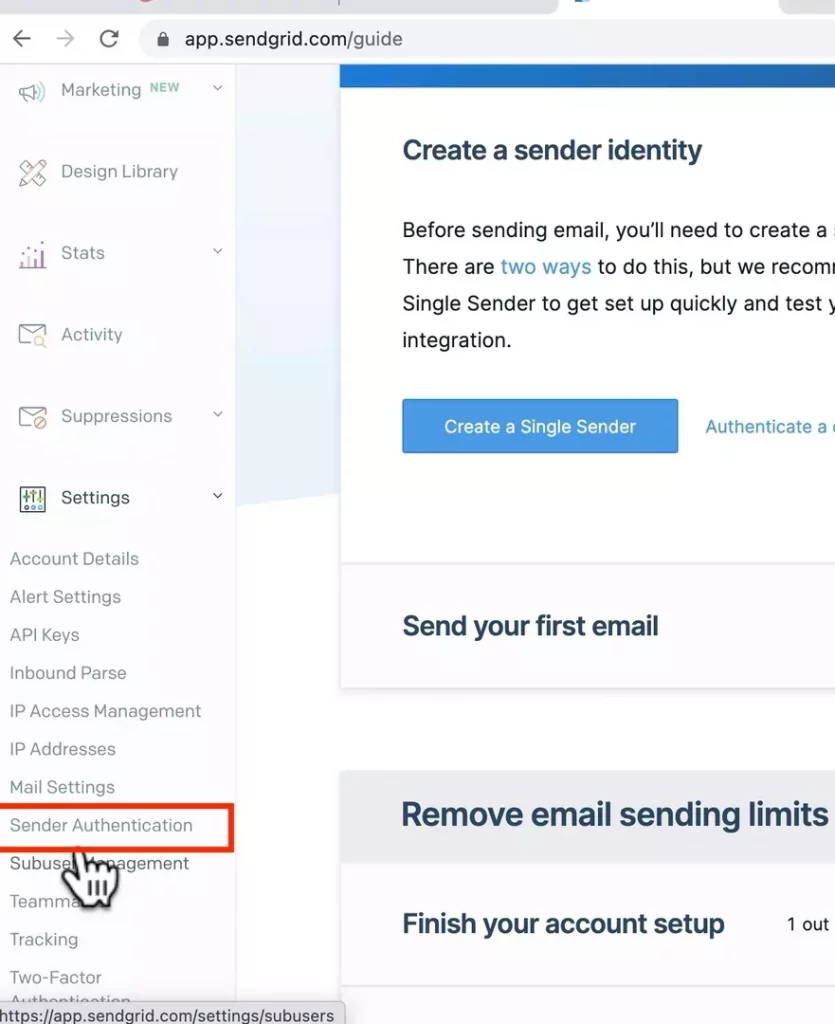
You need to authenticate your domain to get your API key.
- Click on “Get started”
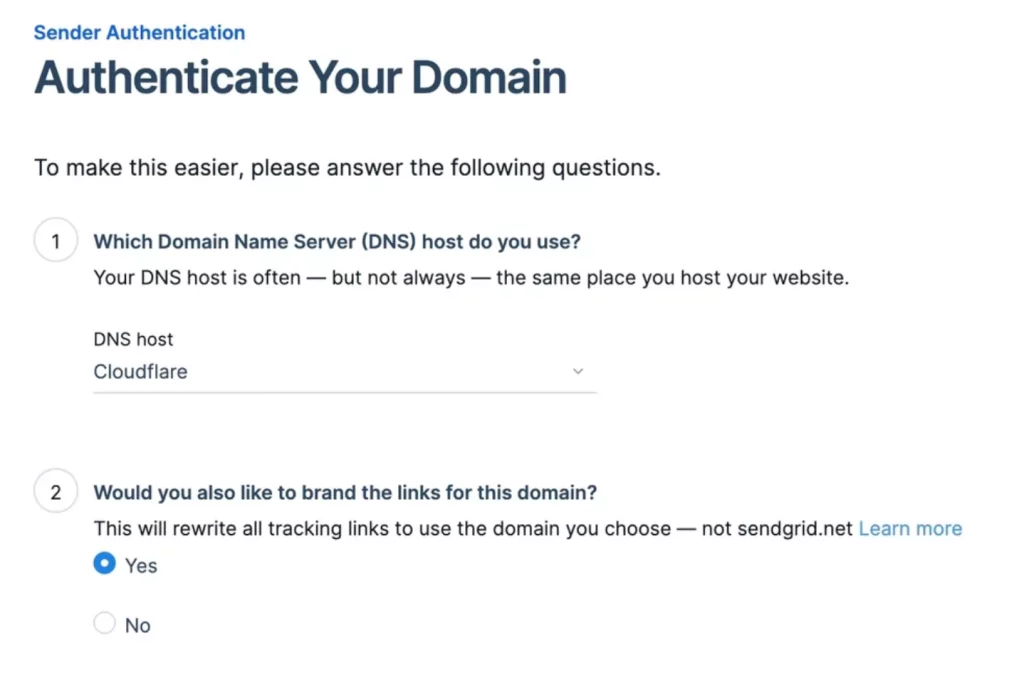
- Under one for dns host, click on the drop down click on Cloudflare because Groove uses Cloudflare so you would select that option.
- Under two, “Would you also like to brand the links for this domain?” just click on yes.
- Click on next
- Under domain you send from enter in yourdomain.com
- Click on next
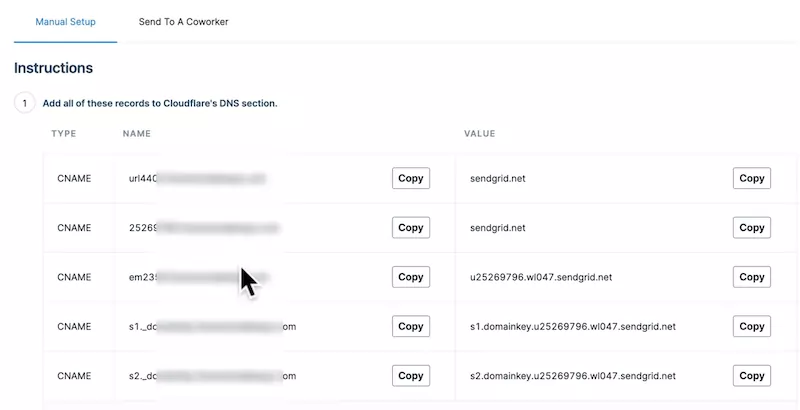
Now you’re given five CNAME records that you need to add to Groove DNS.
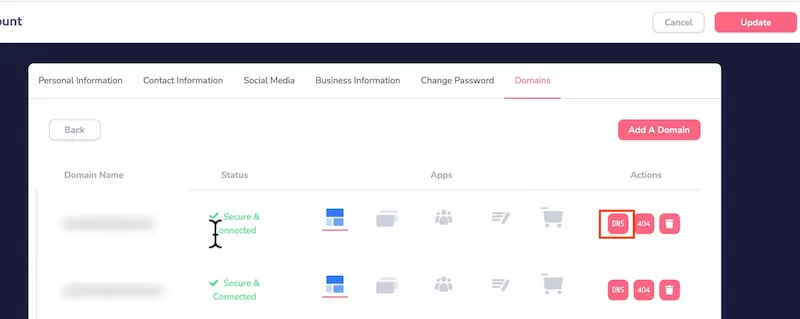
- Open up another tab log back into Groove, click on your avatar on the top right
- Click “my accounts” > domains > custom domains > manage
- Locate the domain that you created an email address for
- Over to the right you will see a pink DNS button, click on it
If you’ve already got your email account set up you should have MX records and txt records in place.
If you haven’t got an email account, the DNS section should appear blank.
You want to head back into Sendgrid and copy and paste those 5 CNAME records into Groove’s DNS.
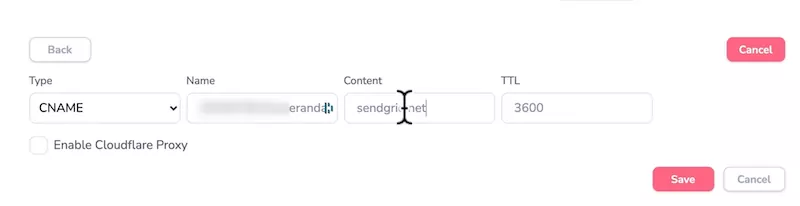
- Click on Add Record
- Under Type: Select CNAME
- Under Name: Paste in Sendgrid’s Name
- Under Content: Paste in Sendgrid’s Value
- Leave TTL as is
- DO NOT enable Cloudflare proxy
- Click Save
Once you’ve added all five CNAME records, head back to SendGrid and tick “I’ve added these records” and click “Verify” button.
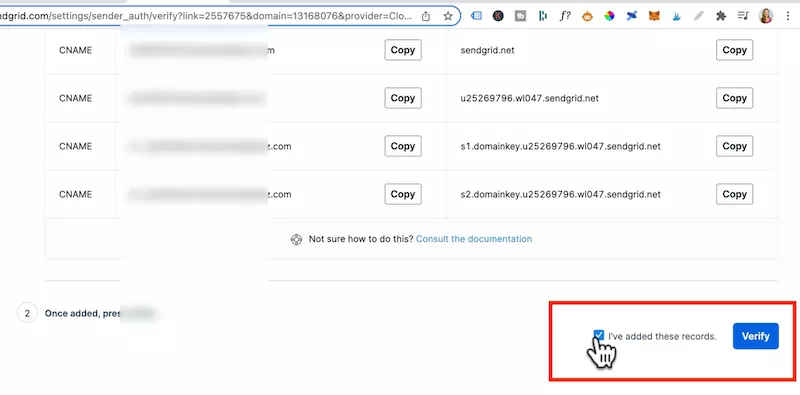
You’re going to click on “Return to sender authentication” button
Now you will see domain authentication status is verified and the same goes for link branding.
Step 3: Create SendGrid API key
Over to the left sidebar, click on “api keys”, click create api key.
- Give your api key a name
- For api key permissions leave it at “full access” and click on create
- Click on copy to copy your API key
- Head back into GrooveMail tab where you added your Sender Info
- Scroll down and under “API Key”, paste in your Sendgrid API key
- Click save
Once you click on save, it should take a few minutes for GrooveMail to send an email verification.
Once you click on the verify button that GrooveMail emailed you, your Sender status should go from a No to Yes verified.
Step 4: Add GrooveMail Webhook URL to SendGrid (Temporary)
The last step is adding GrooveMail’s webhook url to Sendgrid.
Again this is not required when GrooveMail has their own smtp but in the meantime you would go to “actions” click on “get webhook url”, copy that URL.
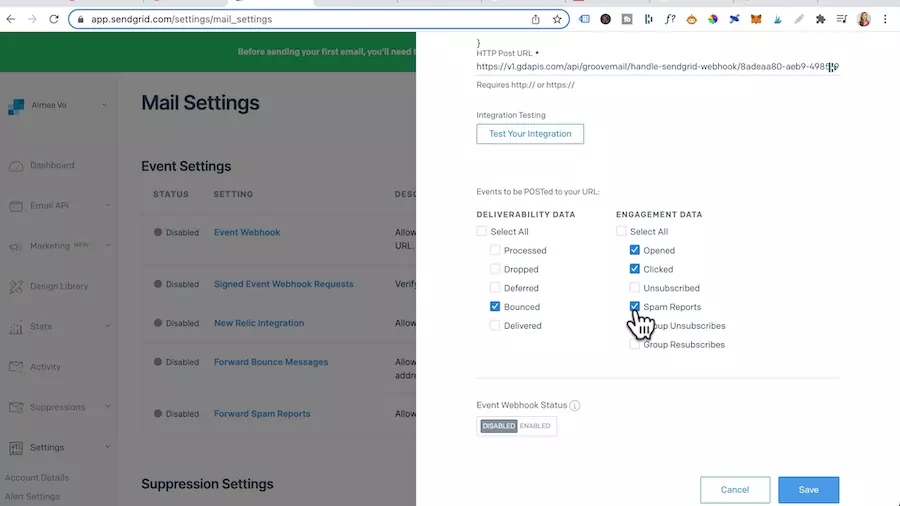
Head back to Sendgrid, head down to settings again click on “Mail settings”.
Click on “event web” hook link.
- For Authorization method: leave as none
- For the http post url, paste in GrooveMail’s webhook url
- Scrolling down check on “bounce”, “open”, “clicked”, and spam reports
- Under “event webhook status” toggle that over to Enabled.
- Click on save.
Okay we’re done, now remember that GrooveMail will have their own SMTP coming very soon so you won’t have to connect to Sendgrid or add the Webhook url as a paid customer.
Want To Get More Clicks In Your Emails?
You NEED unique custom 3d mockups, book covers, lead magnet images, online course mockups and funnel graphics to get people’s attention.
I’ve always struggled with design and could not justify hiring expensive graphic designers.
Not anymore.
The banner below was created WITHOUT any design skills and under 60 seconds.
Just point-and-click, drag-and-drop, then export!
Click the banner to learn how you can create stunning 3D digital product mockups, social media graphics and funnel graphics without any design skills.
Yes you can add them in GrooveMail!