How To Send Students Logins In GrooveMember
In this post, I’m going to show you how to give login access to a free course or free membership site in GrooveMember.
Plus have GrooveMember send your students a login link, username and password.
Now GrooveMember is an app within the GrooveFunnels platform and with your free GrooveFunnels, you can create 1 membership site for free and up to 100 students.
On the Groovefunnels lifetime plan, you can create unlimited GrooveMember sites.
Ok, there are 2 options to giving your students Free access to your membership site or course:
- The first method is to manually add a person’s contact details in the back office of GrooveMember OR
- Creating a GrooveSell product funnel and setting your membership price at $0.
Using the second method, your students won’t need to enter any payment details and the GrooveSell order form will act like a sign up form.
Option 1 – Manually Adding A Person In GrooveMember
I’m going to assume that you’ve already created your your course or membership site in GrooveMember.
If you don’t know how to create a membership site in GrooveMember then check out my GrooveMember tutorial on Youtube.
- When you’re in GrooveMember, click on “Members” > “My Members”
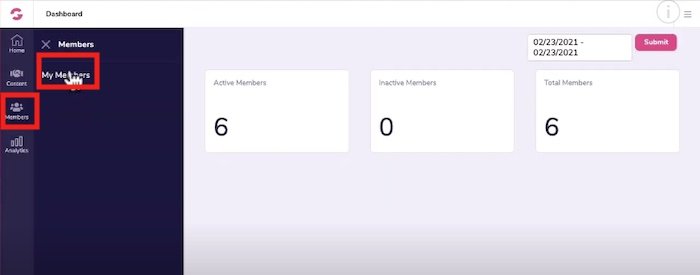
- In the drop down arrow, select your membership site name – in this example, I’ll select “Test Course”
- Click on “New Member”

- This will open up a light box – enter the first name, last name and email of your student.
- Assign the level of membership you want to give them and press save.
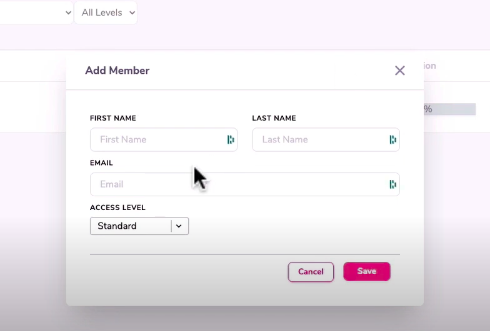
GrooveMember will automatically email your student with their login details.
Option 2 – Creating a GrooveSell Funnel With Sign Up Form
If you like to automate the process, the second option is to create a GrooveSell funnel where you price your course at $0 and the order form acts like a sign up form.
I’m going to assume you know how to setup a basic product funnel in GrooveSell but I’ll also quickly run through the steps in this training as well.
- Login to GrooveSell
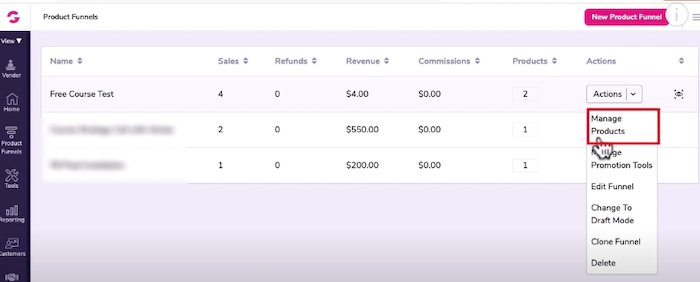
- Click on “Product Funnels” > “Product Funnels” again
- Locate the funnel for your Free course or membership site, under actions, click on “Manage Products”
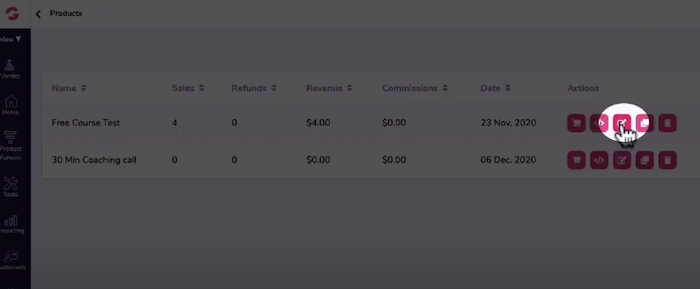
- You’ll see your product name, click on the pencil icon to edit your products
Let’s quickly run through how you would setup a product funnel for a free course.
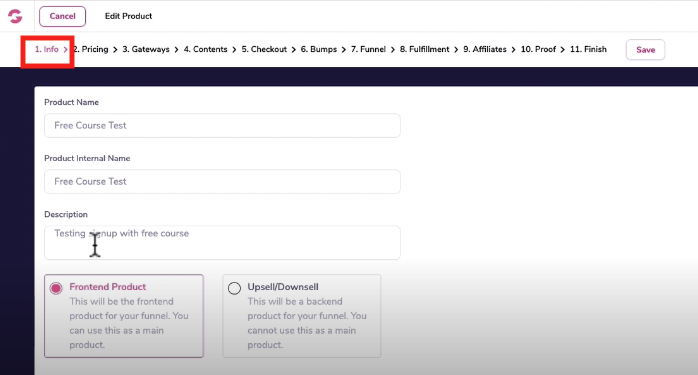
- Login Info
- Product Name: give your free course a nem
- Product Internal name: internal name for your reference
- Description: give your course a description
- Frontend Product or Upsell/Downsell: since this is just one product, you will leave it set to “Frontend Product”
- Once you’re done, click on “Save & Next”.
2. Pricing
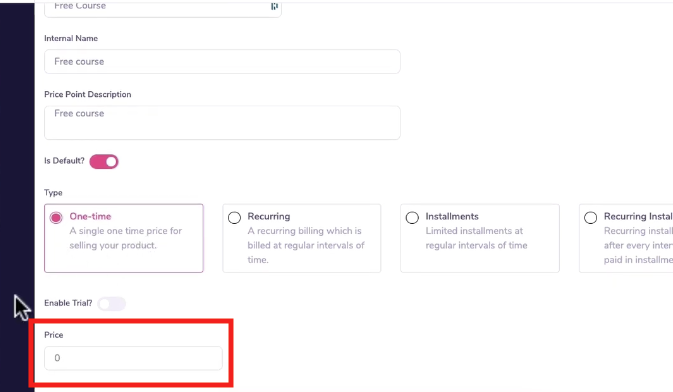
- Price Point Name: enter the name of your course again
- Internal name: internal name for your reference
- Description: give your course a description
- Leave it set to default
- Type: this is a one-time product
- Price: Set the price of the course to $0
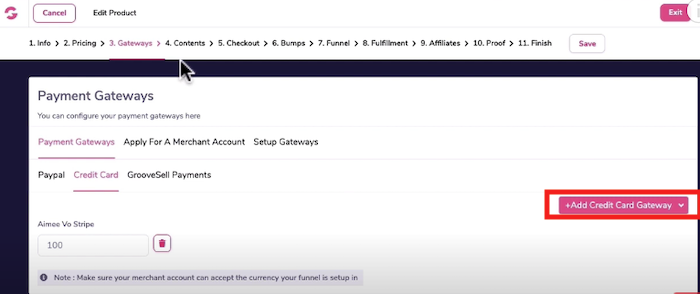
3. Gateways
- You don’t need to add any payment integrations for a free course
- If you have two price points, one free and one paid course then you should integrate payment gateways here.
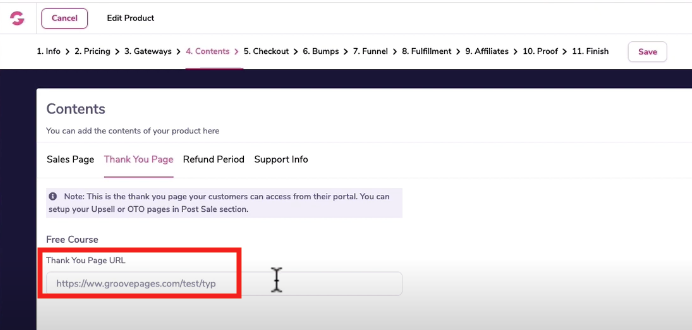
4. Contents
- Sales Page: enter in your sales page URL
- Thankyou Page: enter your Thankyou page URL
- Refund period: enter any refund period, I usually leave it at 30 days
- Support Info: if you have a help desk URL, enter it here or a support email
5. Checkout:
- Look & Feel: upload your product image and change your order form colors if you wish
- Form Fields: add more fields on your order form
- Express checkout: leave as is
- Cart abandonment: connect your your email marketing provider if you wish here
- Custom Css/Tracking: add google tag manager or any Facebook ads conversion tracking codes here
- Legal: enter a link to your terms of service pages here
- Language: it’s set to English by default
- Quantity: enable whether the number of quantities should appear on your order form. For digital products, just leave it set to “not sold in quantities”
6. Bumps:
- Order Bumps: you won’t set any order bumps for a free course
7. Funnel
- This is will carry forward your thankyou page URL you set previously.
- You don’t need to do anything here and click “Save & Next.
8. Fulfillment
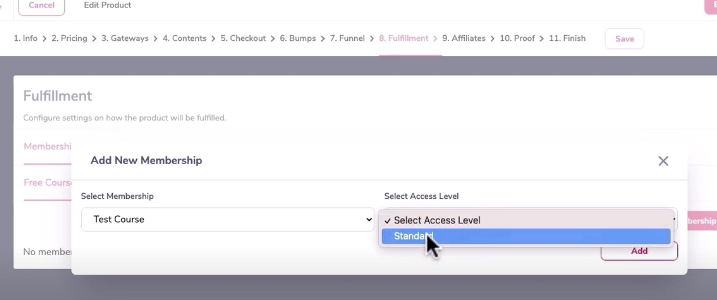
- Under Memberships tab, click on “New Membership”
- Select the membership that is free, select the access level and click add.
- Click save and Exit.
- Click save and next all the way through to step 11 – Finish.
Embed GrooveSell Checkout Element On GroovePages
- Head to your checkout page in GroovePages
- Click on elements, you want to scroll down to ECommerce and drag in the GrooveSell-checkout element
- Click on the pencil icon to edit the checkout
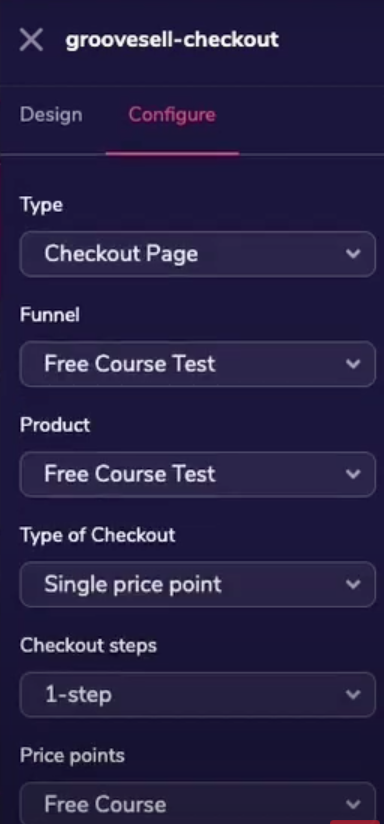
- Over on the right, click on the Configure tab.
- Under Type, select “checkout page”
- under Funnel select the “Free Course Test”
- Under Product select the name of that product.
- For type because I have a single free course without multiple price points I would select “single price”. However if you want your check out form to show a free and paid course at different price points, you would select Multi Price.
- Under Checkout, keep it to 1 step given that this is a free course and you want less friction.
- Under price point it would be the free course price point.
- Click update
Let’s click on the eye icon to preview the checkout page.
You can see here that when you send your students this checkout page URL, they don’t need to enter in their payment details.
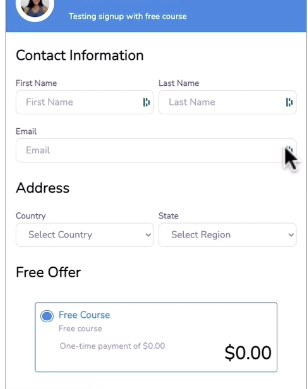
Once a student clicks get access, it will redirect to the thankyou page that you configure in GrooveSell.
On your thankyou page, you would say “please check your email and look for an email from GrooveMember with your login details”
GrooveMember will automatically send your student’s their login details.
Create Stunning Funnels That Sell Like Crazy?
If you want to create stunning funnels that sell your products like crazy, I recommend writing great copy with relevant CUSTOM graphics.
In this day and age, people don’t read long blocks of copy.
They’re skimming and only stop scrolling when they see a compelling image.
You NEED unique custom 3d mockups, book covers, lead magnet images, online course mockups and funnel graphics to make your sales page convert.
I’ve always struggled with design and could not justify hiring expensive graphic designers.
Not anymore.
The banner below was created WITHOUT any design skills and under 60 seconds.
Just point-and-click, drag-and-drop, then export!
Click the banner to learn how you can create stunning 3D digital product mockups and sales funnel graphics without any design skills.
