
GrooveMember Portals is a feature in GrooveMember that allows you to showcase all your courses on one page.
If you haven’t read my GrooveMember review, read it first so that you can learn all the core features.
With your free GrooveFunnels account, you can create 1 membership site or course and add up to 100 members for free.
You can create unlimited GrooveMember sites, course portals and have unlimited students on Groovefunnels platinum lifetime.
If you haven’t read my review yet on the platinum lifetime plan, get the full details here.
And if you don’t have a FREE Groove account yet, sign up below:
GrooveMember Course Portal Example
In this demo, let’s say I have 3 courses:
- Youtube Course
- Affiliate Marketing Course
- Groove Automation Course
These 3 courses will be in ONE portal and linked to a portal subdomain i.e. portal.yourdomain.com
The best part is that GrooveMember Portal has single-sign-on which means your students can access all these courses with one login using the same email and password.
If you watched my previous training on How To Create A Membership Site For An Online Course , in step 7, you no longer have access to the registration link, this is now managed via Portals.
GrooveMember Portal Design Tutorial
What You Need To Have In Place Before Creating GrooveMember Portals
Now, I’m going to make the following assumptions:
- That you’ve already created your course and loaded your lessons on GrooveMember
- You’ve created a portal subdomain on Groove’s custom domain i.e. portal.yourdomain.com:
- You would need to connect your root domain first in order to create a subdomain (If you haven’t, then watch this video here).
- Once you’ve done that, you can create your subdomain by going to:
- Head to your Avatar in the top right > My accounts
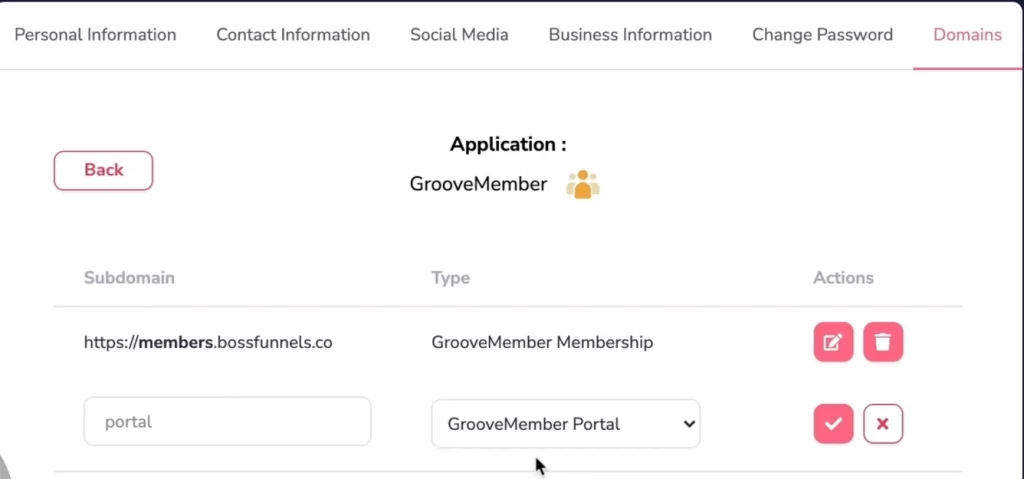
- Domains tab > Custom domains > manage
- Locate the domain you want to create a portal for
- Click on GrooveMember and pencil to edit
- Click + button
- Create a subdomain called “Portal”
- Under type: select “GrooveMember Portal”
- Click on “check” button.
3. I’ve also assumed that you’ve created your course sales pages on GroovePages and have the URL handy because you’ll need it later.
Now that we have got that out of the way, let’s create a portal.
Steps To Creating A Portal In GrooveMember
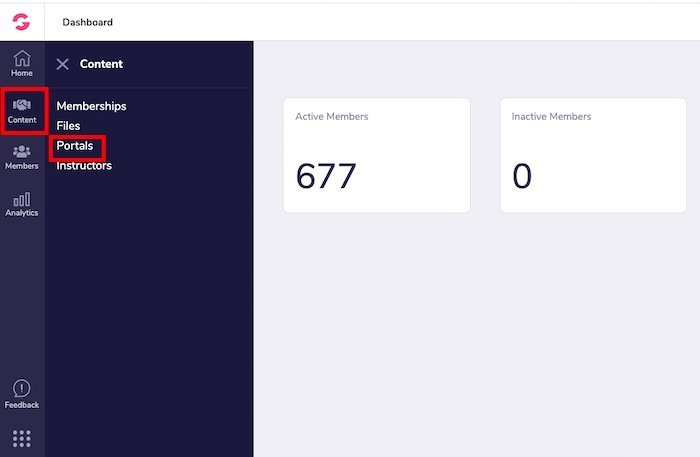
- When you login to Groove, click on the “GrooveMember App”.
- The portals feature is located in the left panel. Click on “Content” > “Portals” as per the screenshot below:
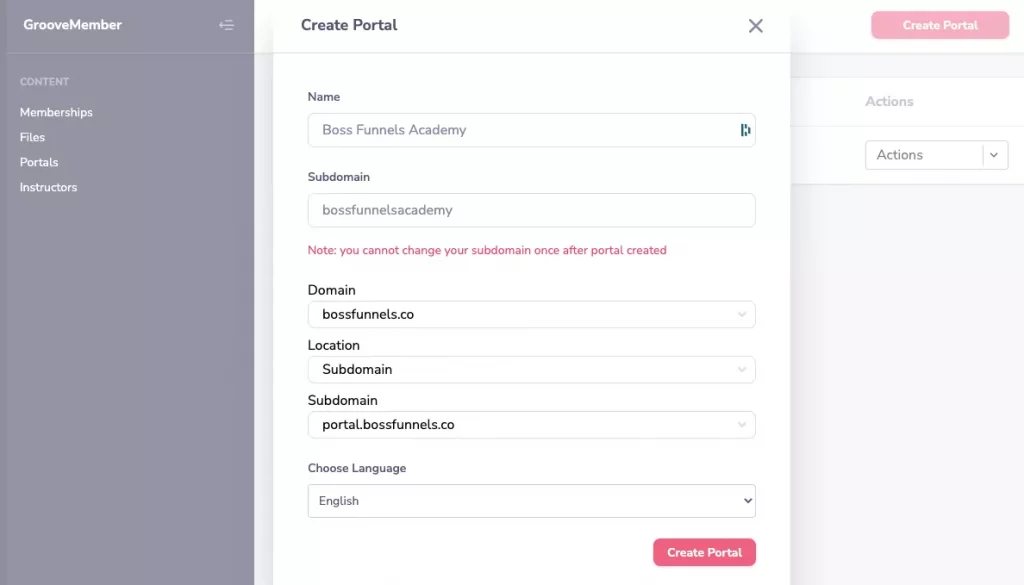
- Click on “Create Portal” on the top right corner.
- Give your portal a name, description, select your subdomain and click on “Create Portal”
Configuring Your GrooveMember Portal
There are 5 steps in configuring your GrooveMember Portal
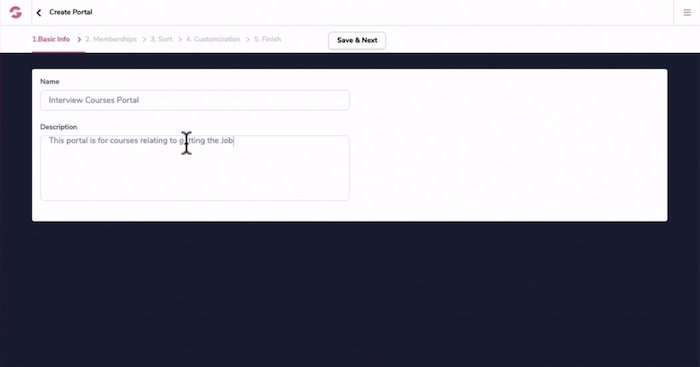
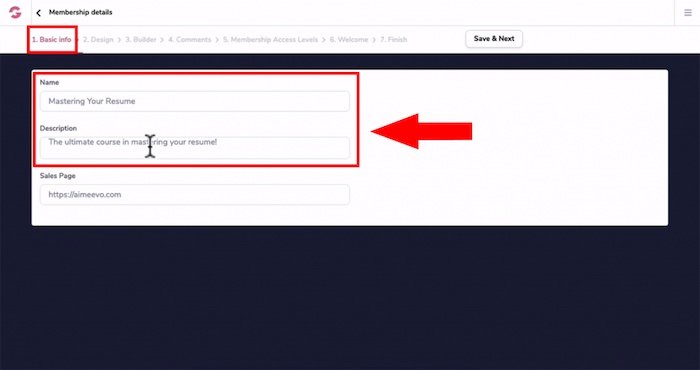
Step 1: Basic Information
- Enter a description regarding your portal.
- Click “save and next”.
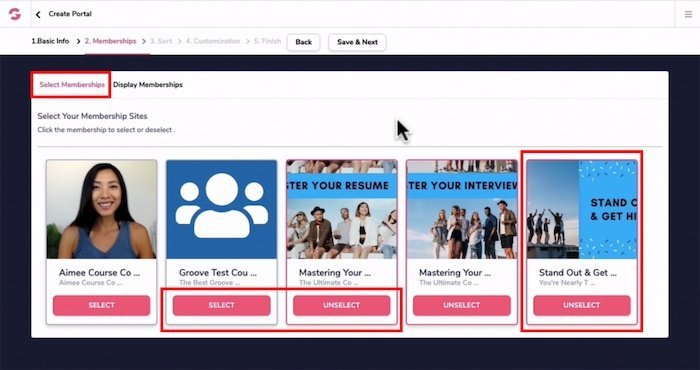
Step 2: Membership Site Selection
- Under Select Membership tab, this is where you can select the courses or memberships you created in GrooveMember
- Once you select the courses or GrooveMember sites you want to be added to the portal, you notice a pink border outline and the button text will change from “select” to “unselect”.
- If you change your mind, click on that button again and it will revert to select and the pink border outline will no longer show.
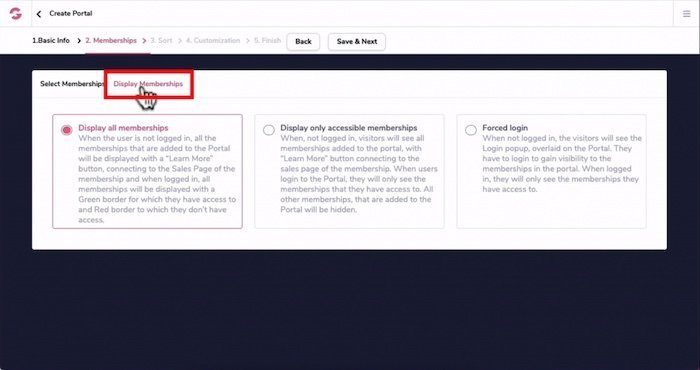
- Under the “Display Membership Tab”, this is where you can manage how your courses can be displayed.
- The first option is to “Display all memberships” – this is the option you’re most likely going to use and it means when a user is not logged in all the membership or courses you have will have all your courses displayed in the portal.
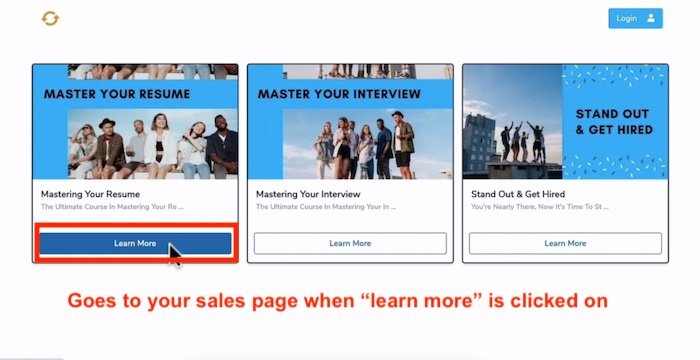
- Under each one of your courses, there will be a “Learn More” button when your GrooveMember site is displayed.
- If someone clicks on the learn more button they will be redirected to the sales page.
- When a user is logged into your portal, all the courses that have been purchased will have a green border outline.
- The ones that they haven’t purchased will have a red border outline.
- You can also set it at “Displayed only accessible membership” and “Forced login”.
- You can read these on your own and decide if it’s right for you.
- Once you have decided click “Save & Next”.
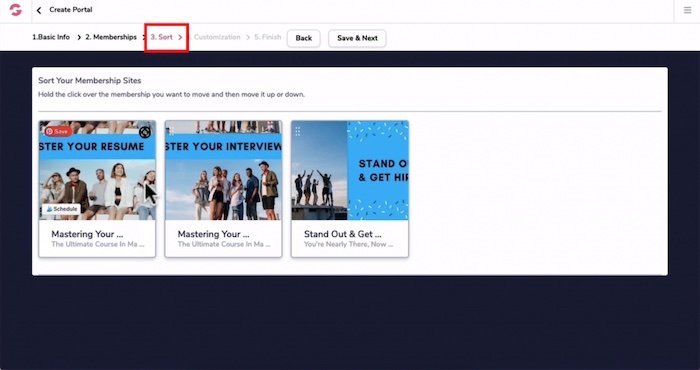
Step 3: Sort – Rearrange GrooveMember Courses
- Step 3 allows you to rearrange the order of your courses in terms of your value ladder or product ascension process.
- For example, you want to teach people on preparing their resume first, then prepare for the interview.
- You would click on the course, hold it then drag it and drag it into a logical order so students know which course to take first.
- Once you’re done, click on “Save & Next”.
Step 4: Portal Design
In my older portal video, the portal design area was a bit bland.
But now you can choose from two themes (more will be added later).
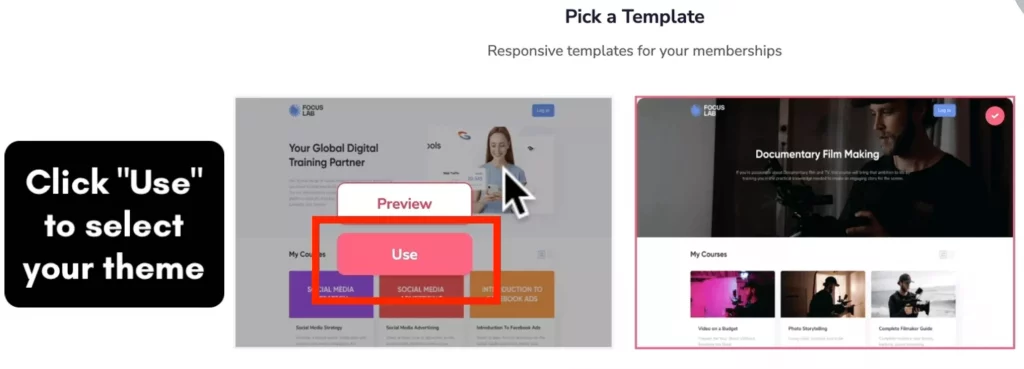
I’ve already selected the second theme and customized it to save time but I’ll walk you through everything.
For you, you will see a “Use” button to select a specific theme.
I recommend watching the video as you can visually see how I go through the styling options:
- Under Global settings:
- Transparent Nav Bar: I usually turn that OFF.
- For “stick to top”: That’s for the navigation bar and I turn that ON so that when someone scrolls down the page, the navigation bar is sticky because the login button is located on the top right and it just reminds people where they should click to login.
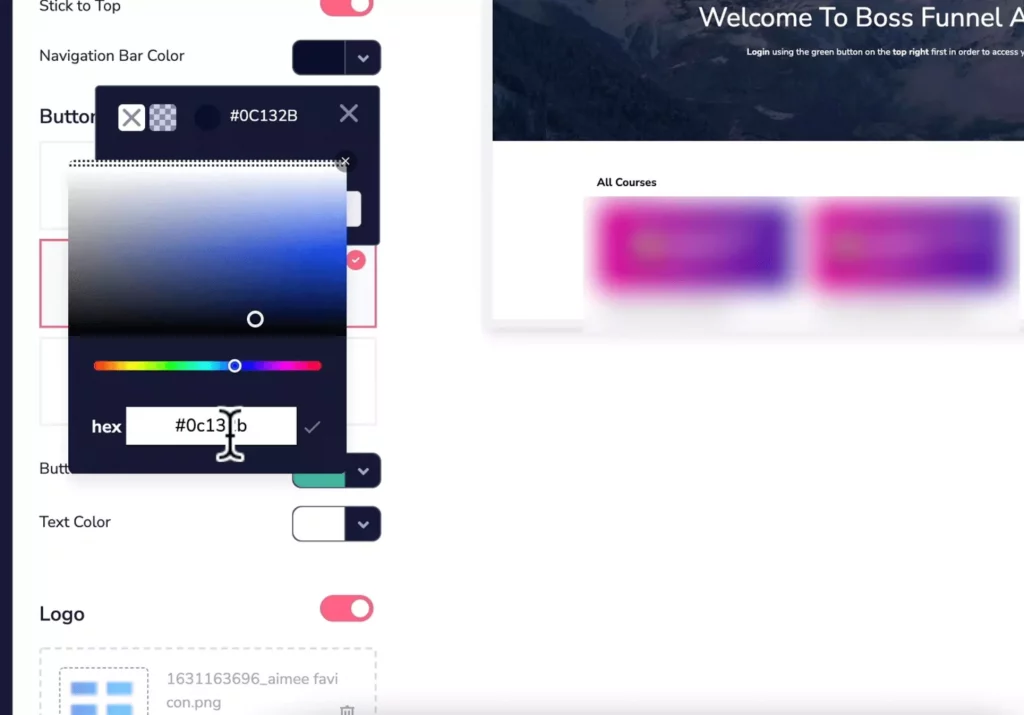
- For Navigation Bar Color: I’m going to go with a darker theme and to change that color. click on it, click on it again and enter in the hex code.
- Button: choose whichever style you like, I’ve select the square.
- Button color: enter your button color by adding a hex code.
- Logo: Click choose image and upload your logo
- For the Footer: You can toggle this ON to display footer. You can enter in your about us, terms & privacy policy link here. For me, It just makes the footer unnecessarily big so the only thing I add here is the copyright text.
- Background color: I’ve chosen to use the same color as the navigation bar color
- Text color: leave it to white
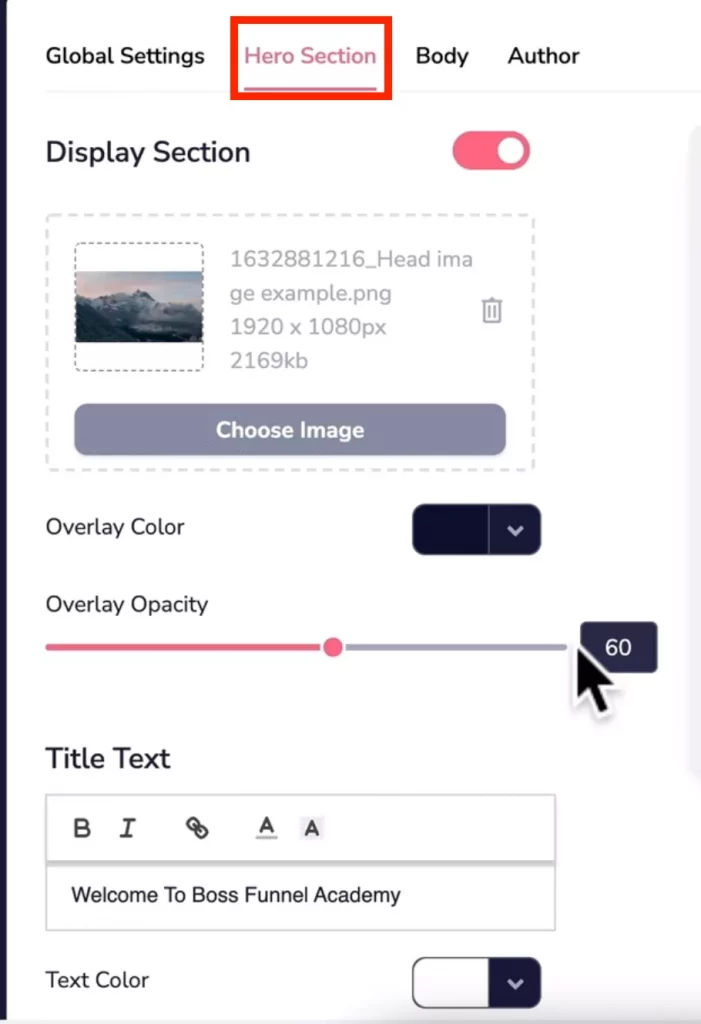
- Scroll back up and click on “Hero Section” tab:
- I’ll leave the “display section” toggled on
- I’ve changed the image to a dark image and I did that by creating a canva image with a dark overlay.
- Click on “choose image”, upload your image and click “select”.
- The overlay color is the same color as the nav bar
- I’ve also set the overlay opacity to 80
- Text Title: Enter your portal title
- Text color: I’ve set it to white because of the dark image background
- Description text: I keep it simple and just tell people where to login to access their courses
- Description color: change it to white as well
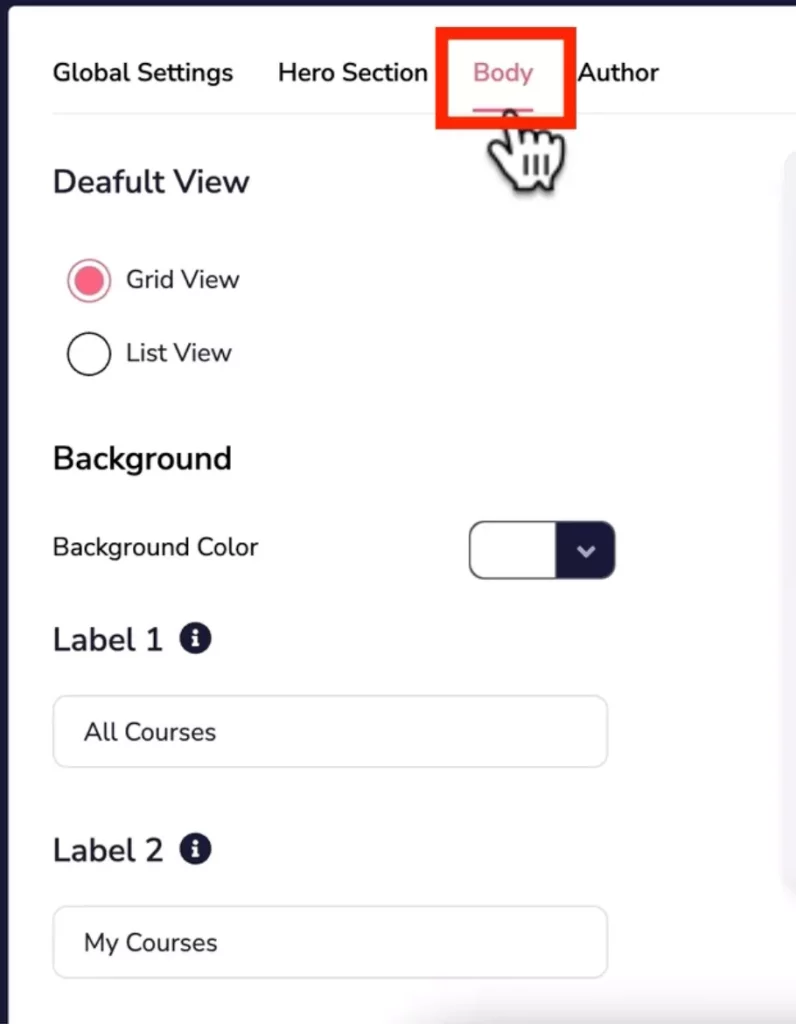
- Scroll back up and click on “Body” tab:
- I like it to be on Grid view but you also have the list view
- I usually leave this background color here to white because the font is default to a black color and there is no option to change it (Perhaps later on there will be a body font color settings).
- Labels: You can change the labels here but I usually leave it as is.
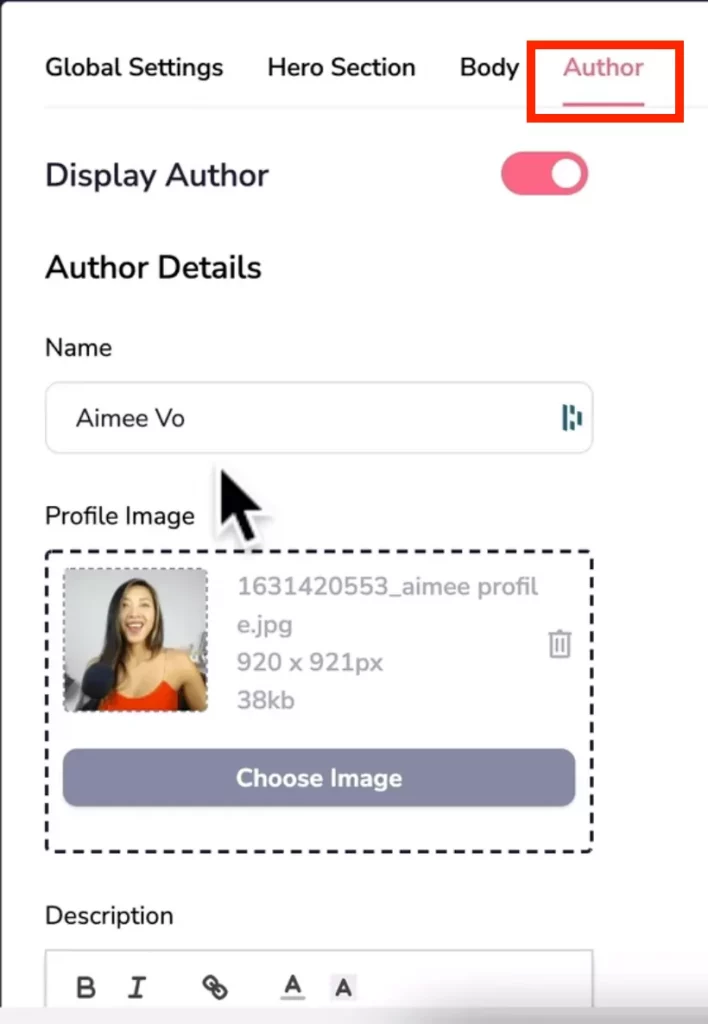
- Scroll back up and click on “Author” tab:
- If your the face behind your brand, then definitely turn ON “Display Author”
- Type in your name
- Upload your profile image
- Description: Just a short description and ask people to take an action like checking out your social channels because you have the option to add your social links right under neath.
- Add your social links to Facebook, Instagram, Twitter, LinkedIn
- For colors: I’ve used the same background color as the footer.
Click “Save & Next”.
Step 5: Finish
- The last page is the URL to your portal that you can share with your students and customers
- Click on “Save & Exit”.
GrooveMember Portal Demo
We’re done, here’s what your clients will see when they login to GrooveMember Portal:
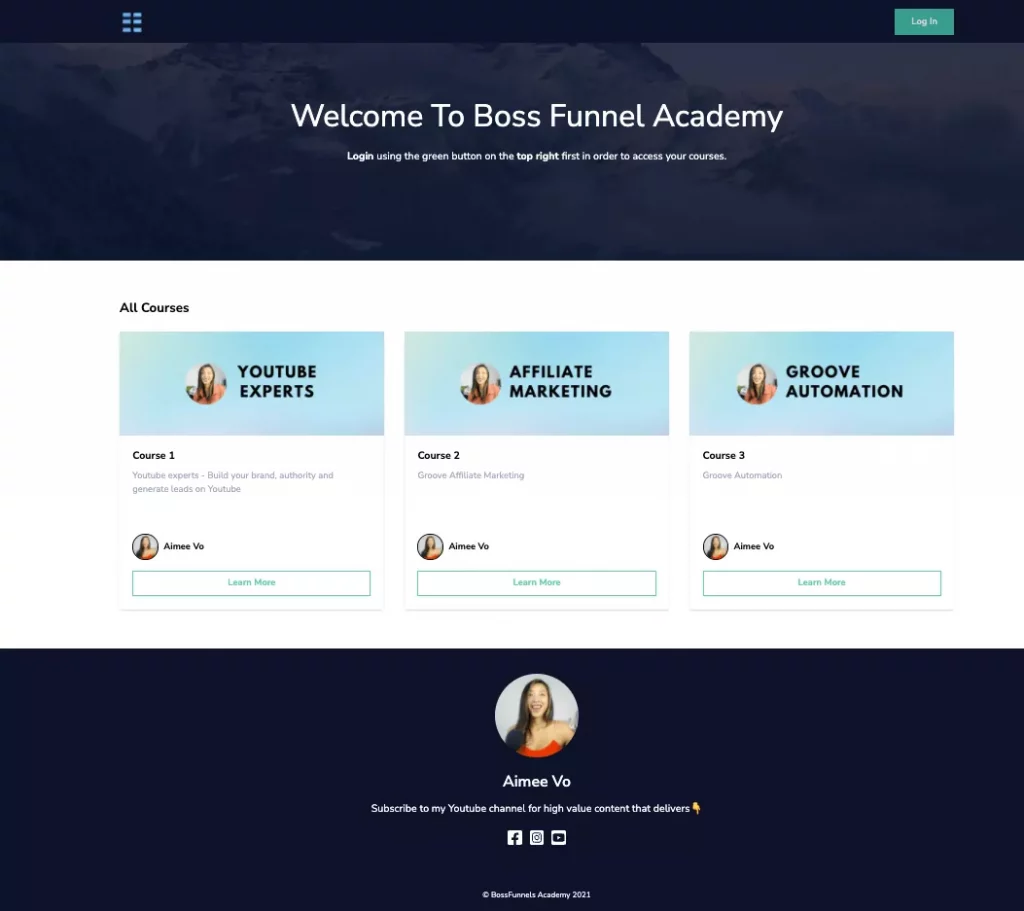
When you click on the “Learn More” button, it will open up the sales page and they can then purchase your course.
Changing Portal Featured Image & Description of Course
If you like to change the featured image and description for your course, here’s what to do:
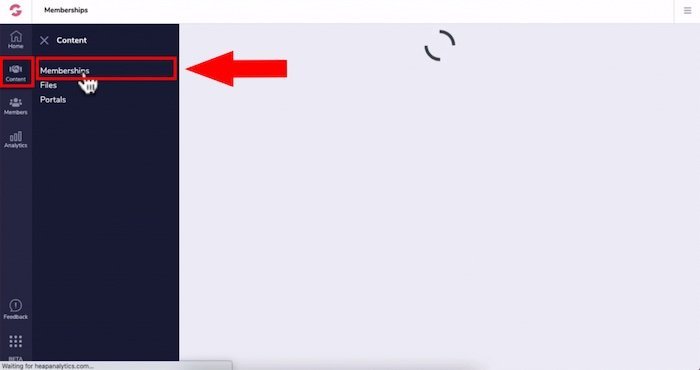
- Head back to GrooveMember.
- Click on Content on the left tab and select Memberships.
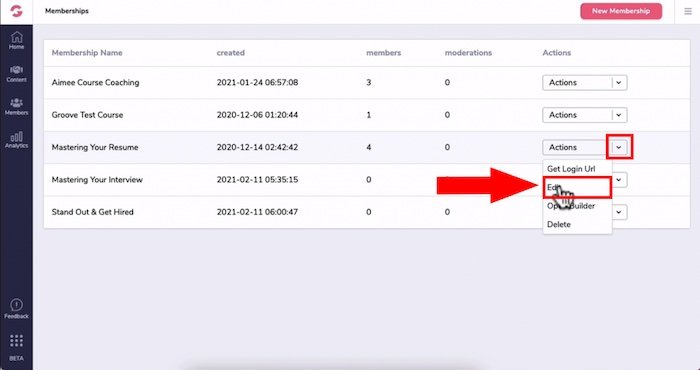
- Head to the course you want to customize the feature image and description
- Click on this drop-down arrow and click edit our GrooveMember site.
- In step 1: Basic Information, this is where you can change the course name and course description.
- The sales page URL is where people will be redirected when they click on the “learn more” button when a member sees your course portal
- Click on “Save & Next”.
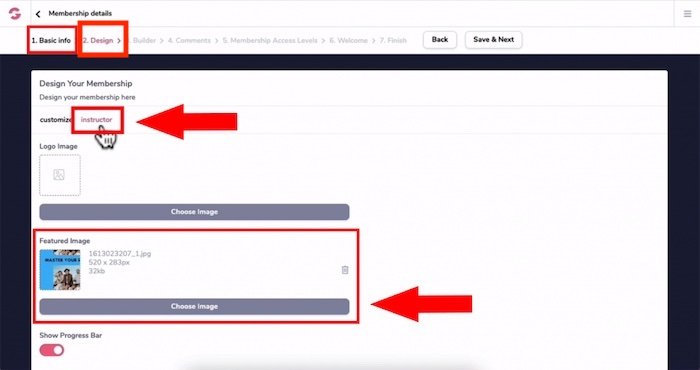
- Step 2: Design, is where you can change the featured image.
- Head to the instructor tab as per the screenshot below
- Under the featured image, click “Choose Image” and select or upload an image.
- The recommended image size is: 300 x 250 px
- Click on “Save & Next” all the way through.
Retrieving GrooveMember Portal Link URL
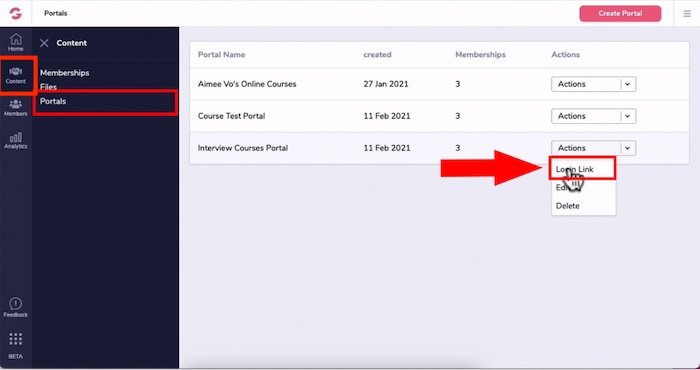
If you ever need your GrooveMember portal link URL, here’s where to find it.
- Head back to “Content” on the left tab and select “Portals”.
- Under Actions, click on the drop-down arrow and then click on the “login link” as per the below screenshot
Want To Increase Your Online Course Sales?
I recommend creating 3D course bundle mockups on our sales page.
You NEED unique custom 3d mockups of book covers, lead magnet images, 3D course bundle mockups and sales funnel graphics to SHOW your product in action.
I’ve always struggled with design and could not justify hiring expensive graphic designers.
Not anymore.
The banner below was created WITHOUT any design skills and under 60 seconds.
Just point-and-click, drag-and-drop, then export!
This is going to save you a fortune on design fees.
If you want your products and services to stand out from the crowd, it’s worthwhile getting professional mockups designs of your course.
Click the banner to learn how you can create stunning 3D digital product mockups and sales funnel graphics without any design skills.