This is the sixth part in the GrooveMail Tutorial video series for 2022.
In this article, you’re going to learn how to:
- Set up an email sequence or autoresponder email series and
- Create an automation to add buyers from GrooveSell to GrooveMail
If you don’t have a Free Groove account yet, sign up below to receive bonus training from me.
GrooveMail Email Sequence & Automation Video Tutorial
The best way to get the most out of this training is to watch the video below.
Trust me on this, it will make more sense once you see how I navigate the GrooveMail interface and fire off email sequences.
But if you prefer to read, here’s the basic gist of what’s required.
Quick Recap on Email Sequences:
- They are: a series of pre-written emails that are automatically sent to specific segments of people on your email list based on “triggers”
- A time-based email sequences (also known as a email autoresponder)are emails sent at predetermined time intervals.
Examples of email sequences:
- Welcome email sequence
- Onboarding email sequence
- Abandon cart email sequence
- Engagement email sequence
In this article, I’ll just cover creating a simple onboarding email sequence and automation for someone who has purchased a coaching call.
Once you’re logged into GrooveMail, click on “Sequence” and “New Sequence”
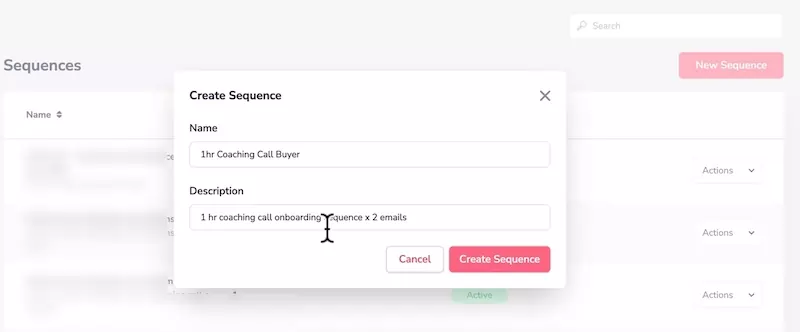
Step 1: Create New Sequence
- Give your sequence
- Add a description
- Click “Create Sequence”
Once you click on create sequence, it will transition to the email sequence builder.
Step 2: Build Out Your Email Sequence
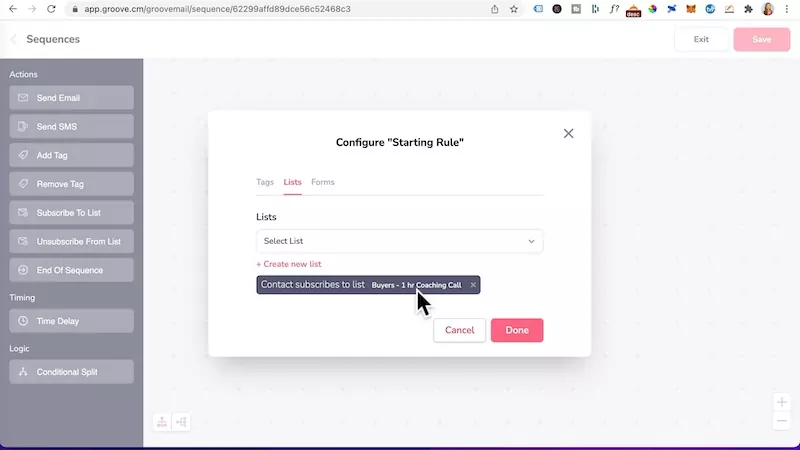
You have the option to trigger this email sequence based on the following “starting rules”:
- Has a tag
- Subscribes to a list
- or Opts into a form
In this case I will select users who subscribes to a list and click “done”.
Buy creating a separate buyers list in GrooveMail, these specific users can enter an onboarding email sequence:
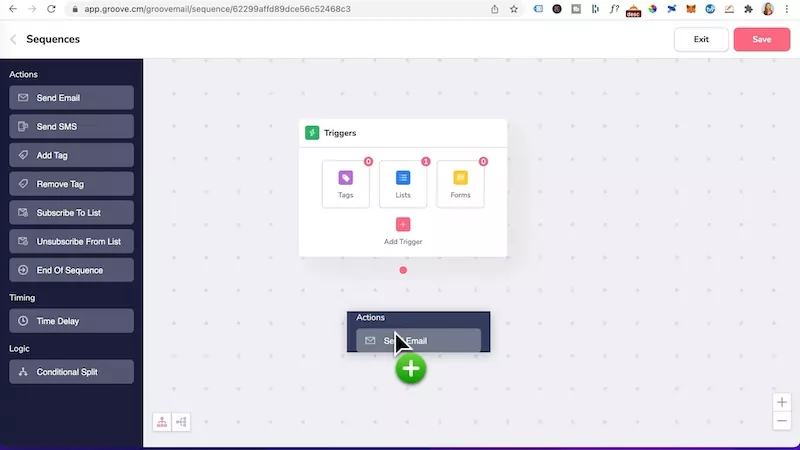
Step 3: Add Emails & Time Delays
Over on the left side bar, you can choose to have a time delay or send an email in the sequence.
Since I want an email to be sent immediately after someone purchases, I will drag in the Send Email action over to the canvas.
Over on the right, the email settings will pop open:
- Name of the email: Email 1 – Thankyou
- Under sender: select your sender email
- Click on the Message tab and write your email
- Subject: Enter a subject for your email
- Preview: Enter a preview snippet test
- Message: this is where the body of your email copy will go.
- Send test email: you have the option of sending a test email
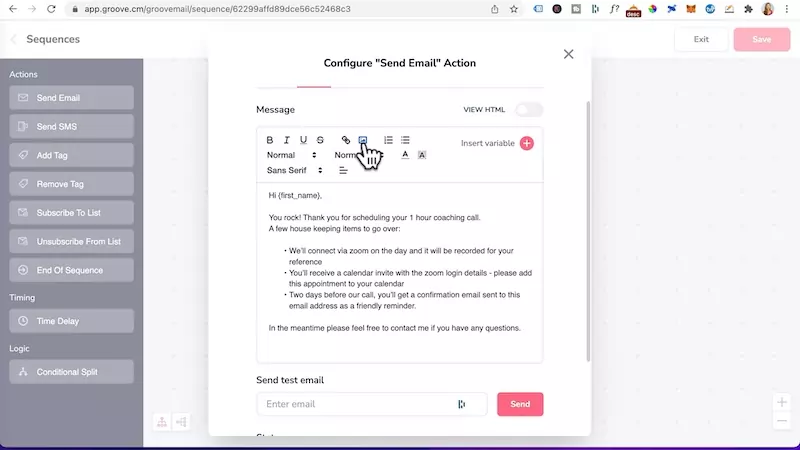
Once you’ve finished your email copy, press “done”.
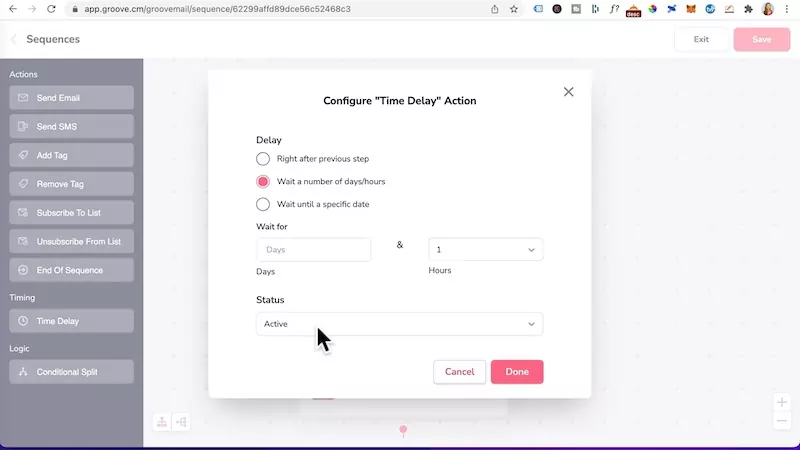
Over on the left side bar, drag in a Time delay element.
I usually set the time delay to: “Wait a number of days/hours”.
Important Note: the time delay is the based on the number of hours or days from the moment the contact enters the email sequence.
So if someone enters your email sequence on a Monday amd you add a time delay to “wait” for 2 days…
Then the next email in the sequence sent will be on a Wednesday.
In the example below, I’ve sent the time delay to wait “1 hour” and clicked “done”.
Now that you know the basics, go ahead and setup as many emails and time delays in your email sequence.
Once you’re done with your email sequence, drag in a “end of Sequence” element.
Step 4: Create A GrooveMail Automation
The automation that we’re about go through is for when you have a GrooveSell product funnel and would like to add your buyers to GrooveMail list.
Plus fire off an email onboarding sequence from step 3.
The cool part is that GrooveMail is connected to GrooveSell.
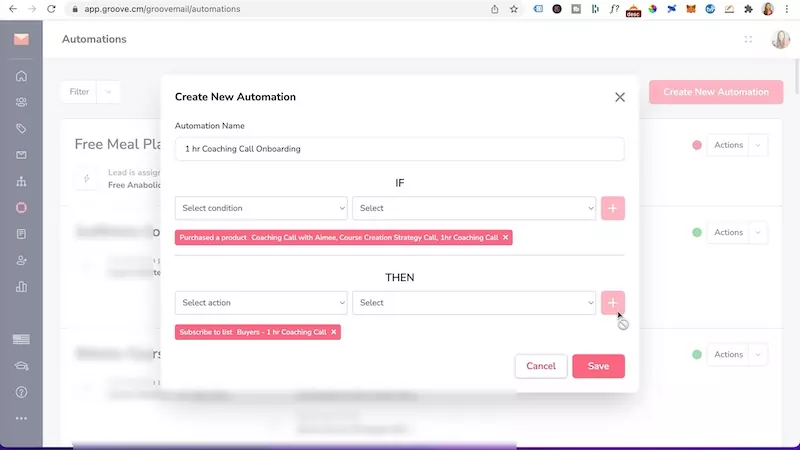
So in this example, we’re going to click on “Create New Automation”:
- Give your automation a name
- Under IF:
- Select Trigger: Purchase a product
- Select the relevant product funnel name and price points
- Under THEN:
- Subscribe to List: select your GrooveMail list name
- Click “Save”.
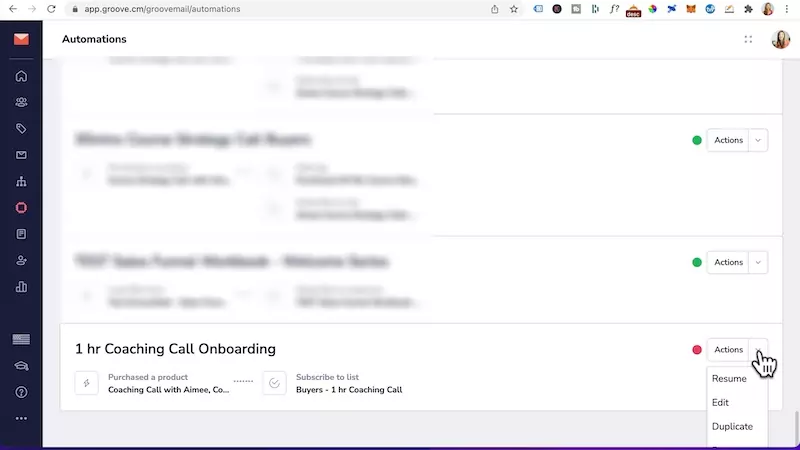
Make Your Automation Live
- Locate your automation name
- Over the right, under “Actions”
- Click on the drop down, and select “Resume”
- You also have the option to edit, rename, duplicate or delete your automation.
Want To Get More Clicks In Your Emails?
You NEED unique custom 3d mockups, book covers, lead magnet images, online course mockups and funnel graphics to get people’s attention.
I’ve always struggled with design and could not justify hiring expensive graphic designers.
Not anymore.
The banner below was created WITHOUT any design skills and under 60 seconds.
Just point-and-click, drag-and-drop, then export!
Click the banner to learn how you can create stunning 3D digital product mockups, social media graphics and funnel graphics without any design skills.
Yes you can add them in GrooveMail!