
If you’re hesitant about creating a WordPress blog and committing to yearly hosting fees then you might want to consider using GrooveBlog.
GrooveBlog is a light weight blogging platform that is similar to WordPress but without the unnecessary features.
It’s ideal for bloggers or small businesses who want to do light blogging.
With your free GrooveFunnels account, you can create 1 GrooveBlog with a custom branded domain for free.
To create unlimited blogs with lifetime hosting, read my GrooveFunnels lifetime review.
Should You Start A Blog?
If you’re thinking of using inbound marketing or content marketing to drive traffic to your website, then creating a blog is a great way to get started.
Through blogging, you can educate your audience on related topics and drive repeat visits to your website.
It helps you build brand awareness, sell more products and establishes authority.
Not everyone will be ready to commit to blogging especially if you have a full time job or have limited resources.
You might want to start out by creating one blog post month and eventually increasing it to once a week.
I recommend you create a editorial calendar for 3 months to plan ahead which topics you like to write on.
GrooveBlog Tutorial
In this article, I’m going to give you a run down of:
- How you can start a blog with GrooveBlog for FREE
- How to create blog posts
- Formatting your blog posts
- Configuring your blog theme
- and how GrooveBlog compares to WordPress
To follow along in this training, you will need a free GrooveFunnels account and when you sign up through my link, you will receive over 40 step-by-step Groovefunnels course from me.
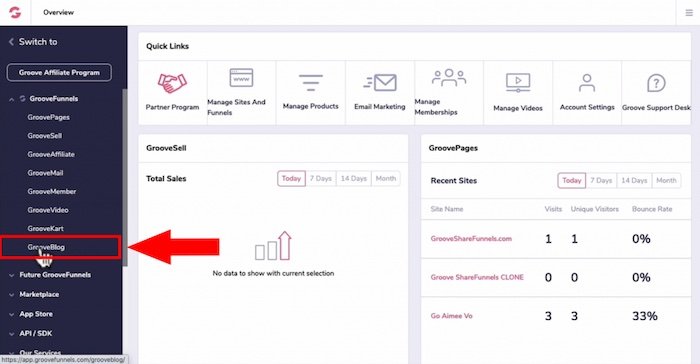
How To Setup GrooveBlog & Demo
- Once you log into your free account, click on “Apps” then select GrooveBlog.
Creating a New Blog
- Click “New Blog” on the upper right.
- Give your blog a name, let’s call this “Gardening blog”.
- For the subdomain name, we’ll just call this “test garden” then click “Done”.
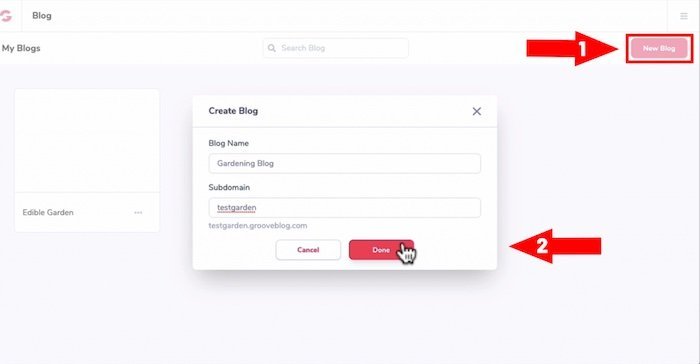
- NOTE: Enter whichever subdomain name you like, this will be a subdomain if you like GrooveBlog to host your domain however you can add your own branded custom domain in the setting area later.
- Once it’s finished loading, Groove will auto-populate your blog post with a few placeholder posts
- You can either delete these posts or edit them.
- Over in the left left-hand panel, there are few tabs that are laid out similar to WordPress, although it’s less overwhelming.
- Since GrooveBlog is in beta, more features and customizations is added in the future.
Let’s go through the tabs you have available in GrooveBlog:
Home Tab
- This gives you an updated view of your home page after you created a post or updated a post.
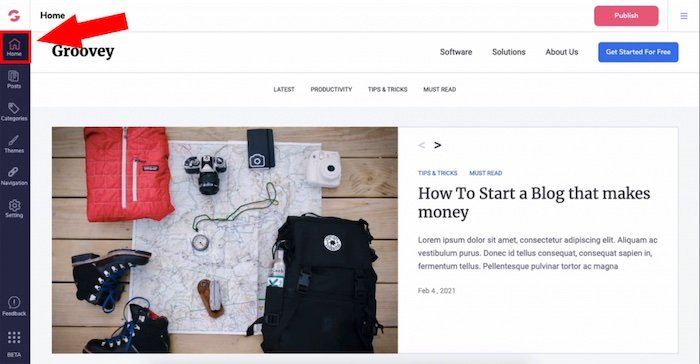
- Click on the Post tab on the left panel.
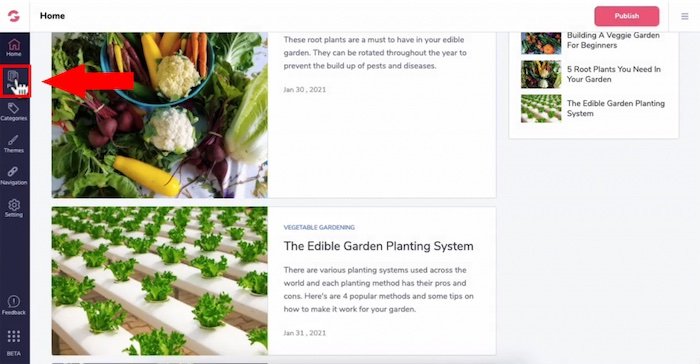
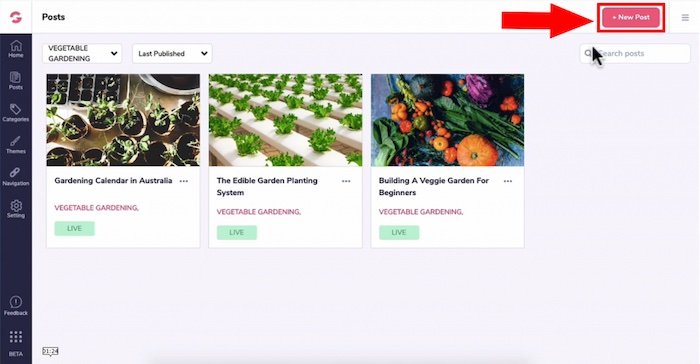
Post Tab
- On the top, click on the drop-down arrow and you can filter your blog posts based on categories.
- Under last publish, you can view older posts first or newer posts first.
Creating New Blog Post On GrooveBlog
- Click ” + New Posts” on the top right.
- Type your post title on top and enter in your post content.
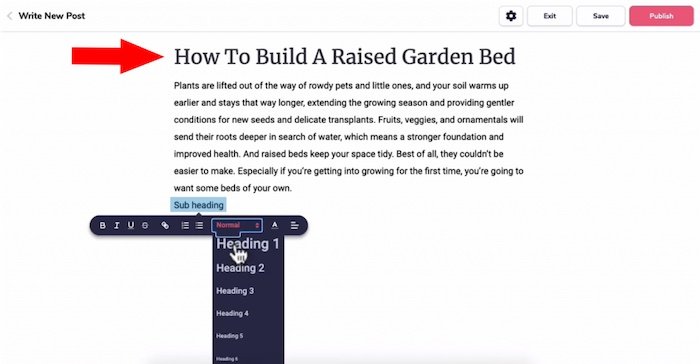
To Create A Subheading
- Type in the subheading out first.
- Highlight it.
- A tab will appear, click on the drop down to select a H2 heading.
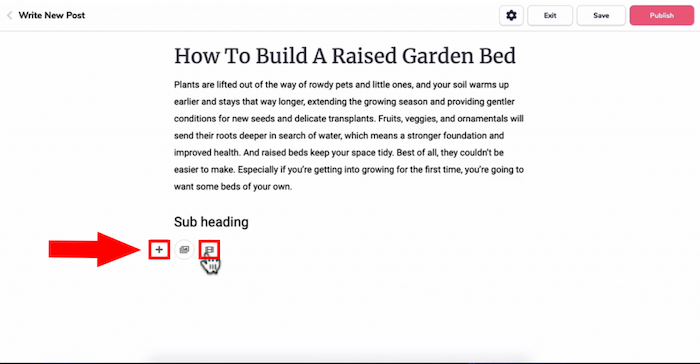
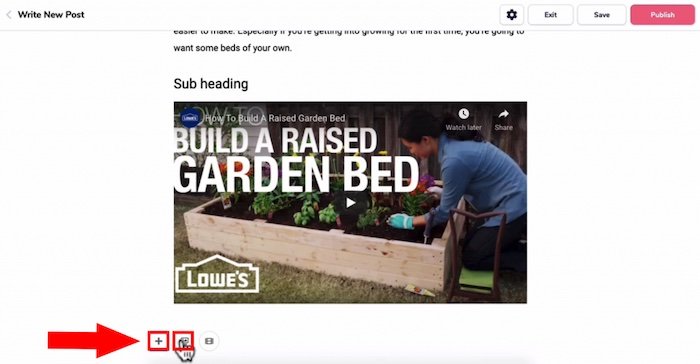
To Add A Video
- Copy the URL of the video on Youtube.
- Click on the “+” and select the film icon.
- Paste in your URL then the video will be embedded.
To Add an Image
- Again, click on “+” and select the image icon.
- You can either choose an image from your library or upload an image.
- Click “Select” and you will see it loaded.
Adding A link To An Image
- Highlight the image then a tab would pop up.
- Click on the link icon and enter in whichever domain URL that you want and press enter.
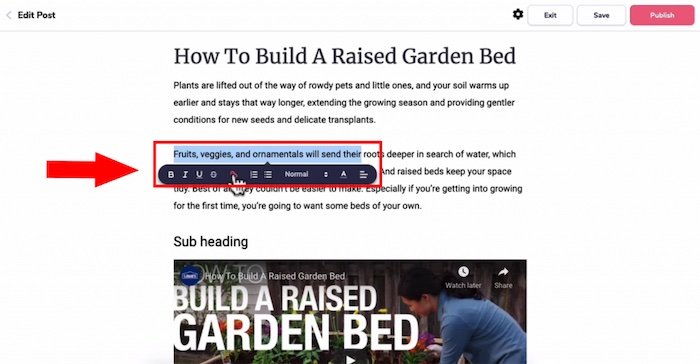
Formatting Font
- Highlight the text and the tab will pop up.
- You can bold, italicize, underline the font and create a link inside of your post or create bullet points.
- You can also change the font color and it’s alignment.
- Once you’re done, hit enter and that will automatically format the font.
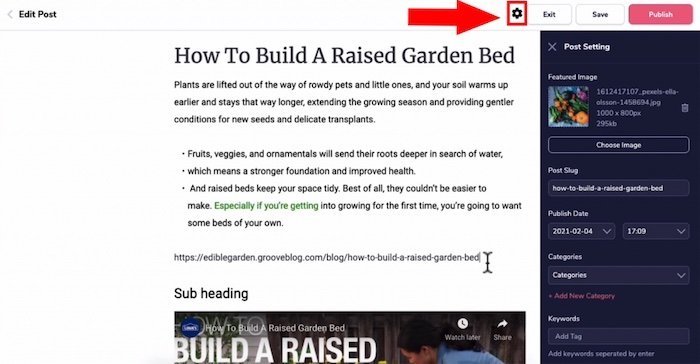
Post Setting
- Head to the cogwheel icon on the top right tab.
- Choose a featured image by selecting on your library of uploading an image with the size of 1000pixel x 654px.
- For the Post Slug, this is where you enter the post URL.
- You can have your Keywords in your post URL if you wanted to.
- For example, “ediblegarden.grooveblog.com/blog/how-to-build-a-raised-garden-bed” which is the post slug and that’s the URL of this particular post.
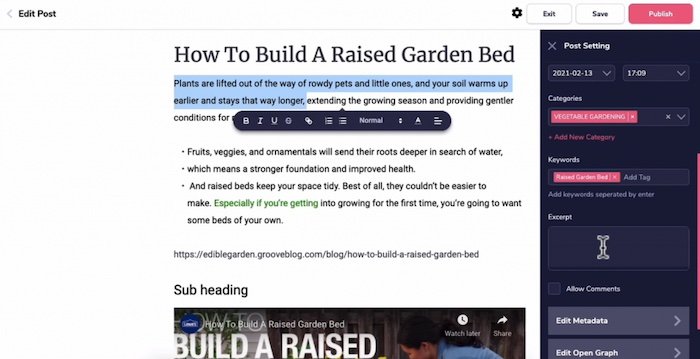
- For Publish Date, you can schedule your blog post at a later date also set the time.
- For Categories, select which category the post belongs to.
- Under Keywords, this will appear as tags for the post i.e. “Ray’s garden bed”.
- For the E xcerpt, it’s the description or a brief summary of the post with 200 characters only.
- You can decide whether you want this post to allow comments or no comments.
- On edit Metadata, you can enter in the title of this post to appear a certain way in Google search engines.
- You would enter in the Meta description with only 160 characters only.
- For SEO, you’d want to put the main keyword within the meta description as well as in keywords.
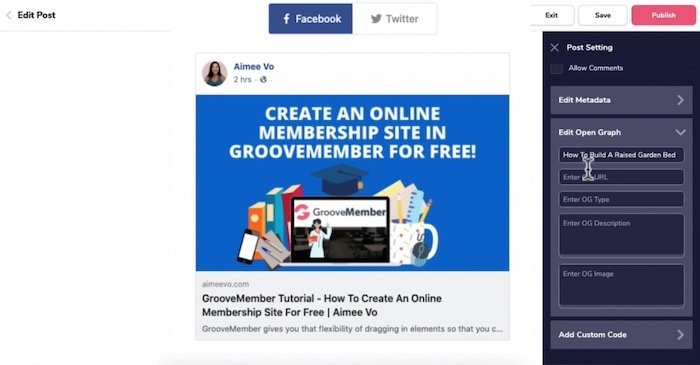
- For Open Graph (OG), these are meta tags that control how your links are displayed on social media.
- You can add your OG title, the URL description of your social media links as well as a custom image.
- For custom code, you can add any CSS or custom codes you want here.
Once you’ve finished drafting your post, you can click “Save” on the top panel to put the post in draft mode or click publish.
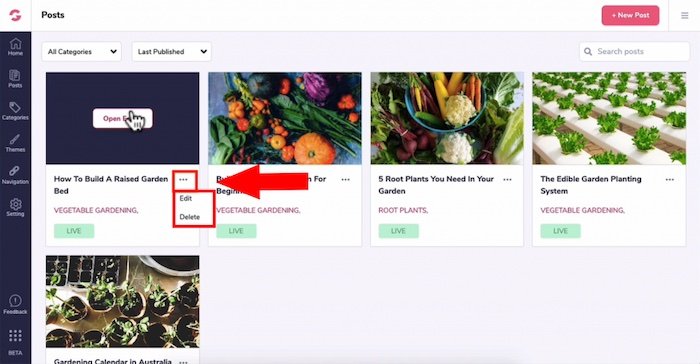
To Delete or Clone a Post
- On the post dashboard, click on the three dots of the post you wanted to delete or clone.
- Select the action you want to be done.
Categories Tab
Editing or Deleting Categories
- Head back to the left panel and click on Categories.
- You can edit existing categories by clicking on the drop-down arrow.
- Clicking on edit or deleting the categories you don’t need.

To Add a New Category
- Click on “New category” on the top right panel
- Enter in the name of your category
- For the slug, i.e. yourblogname.com/category-name and
- For the description, I’m just going to put in that.
- You can have this category appear in the menu navigation by toggling the button to the right.
- Then click Done.
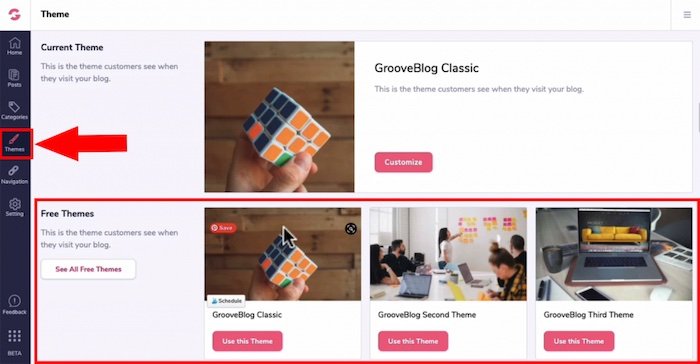
GrooveBlog Themes
- Currently, there are only three themes that you can choose from, however, Groove is planning to add more themes
- Just click on the “use theme”. Click “Yes, change it”.
- Head back to the home tab and you can see how your blog would look like in the front end.
Customize Blog Theme
- Click on the Customize button on the selected theme.
- This will load the default placeholder image and post but don’t worry whatever changes you made will still be active.
Over on the right panel…
- Under the Appearance tab, you will see Typography.
- At the time of recording, there are only three font types.
- You can change the heading as well as the body font by clicking on the drop-down arrow.
- To change the font size by dragging the circle, so there are three fonts size: small, medium or large.
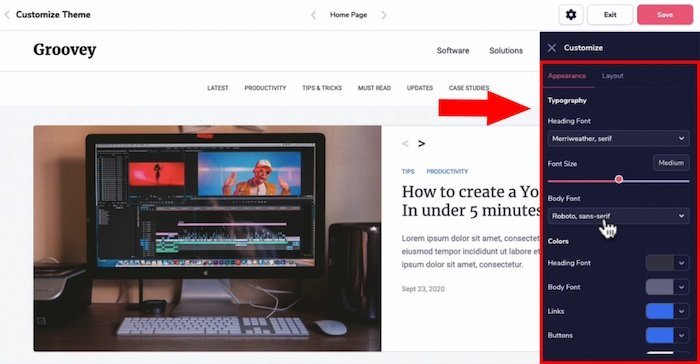
- Under colors, you can change the colors of the heading font, body font, links buttons, button text color by clicking on the circle icon and entering the hex code.
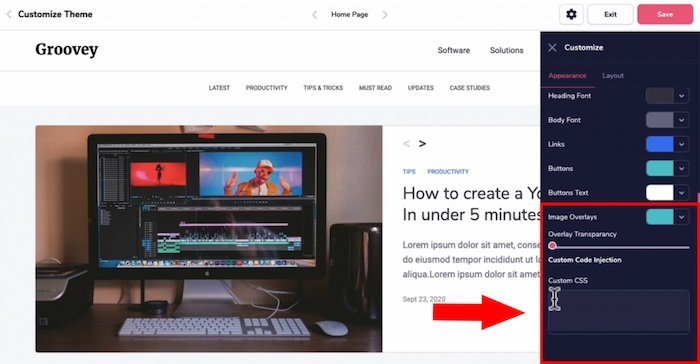
- For image overlay, you can also change the color when you hover over a featured image.
- You can also adjust the transparency of the overlay.
- You can add extra custom CSS code.
- Under the Layout tab, this will allow you to customize the layout of the home page, post page, and category page.
Customize GrooveBlog Home Page Layout
- You can toggle on or off to show the sidebar categories or opt-in forms.
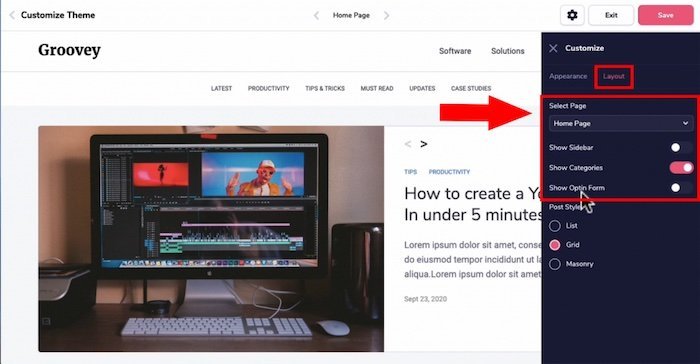
- Under post style, you can have your post in a list, grid or as masonry.
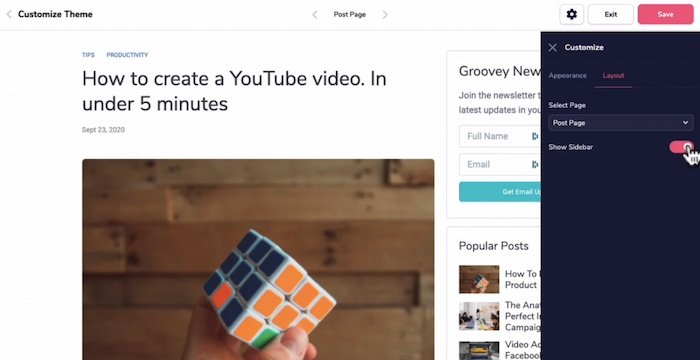
Customize GrooveBlog Post Page Layout
- You can disable the side bar and have it as a single page post.
Customize Category Page Layout
- Categories simply look like post page as well.
- You can have it on the list, grid or masonry.
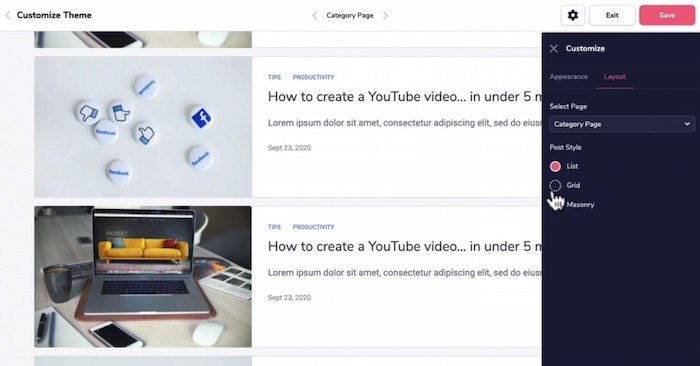
- Once you’re all happy with the layout just click on “save”.
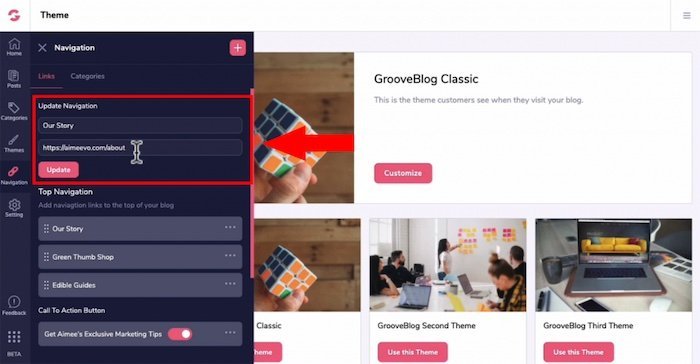
Navigation Links Tab
- Since it’s called “GrooveBlog” you can only create blog posts here unlike WordPress.
- On the navigation menu, you have the top navigation, call to action button, and the footer navigation.
- You can edit existing navigation links by clicking on the three dots and selecting Edit.
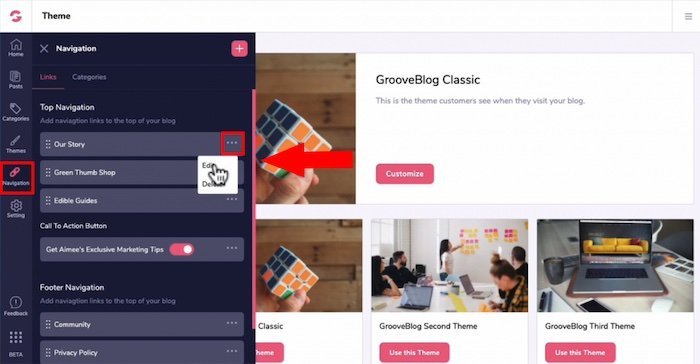
- Enter in the title of the page and add the link to that specific page.
GrooveBlog is designed to be used in conjunction with GroovePages.
In the menu navigation, you will need to add the URL of that specific page.
You can add links to your GroovePages or GrooveKart pages here as well.
Re-Arranging Navigation Links
- Click and hold the nine dots and then you can drag it up or down to rearrange it.
Call To Action Button Link
- You would see the CTA Button on the home page like the image below.
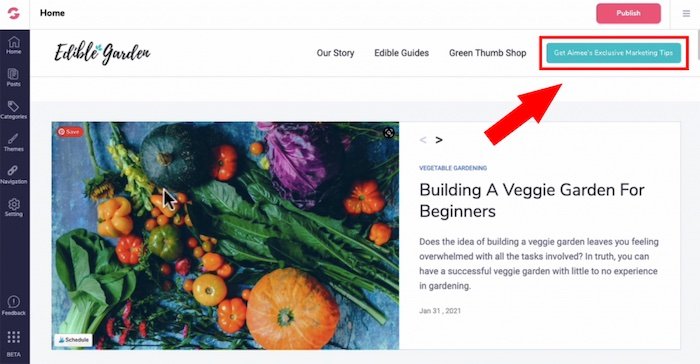
- To customize it, click on three dots and select edit.
- You can use this link to link back to a landing page, add an affiliate link or anything that you like.
- If you want to disable the call to action button just toggle it to the left and it will disappear.
Footer Navigation Link
- Editing the footer is the same, click on the three dots and click on edit or delete the navigation.
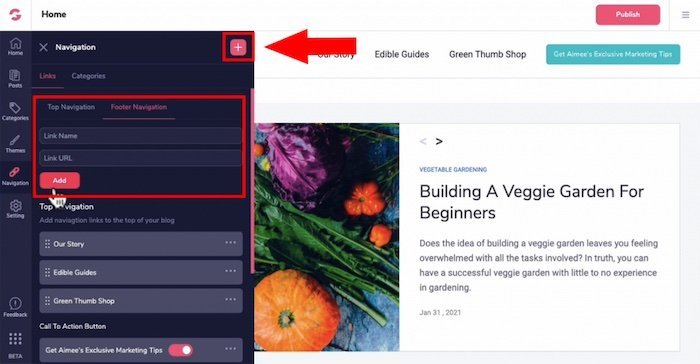
To Add More Navigation Links
- Click on the “+” on the top of the tab and add in your title and link.
- You can have that link in either the top navigation or the footer navigation before pressing add.
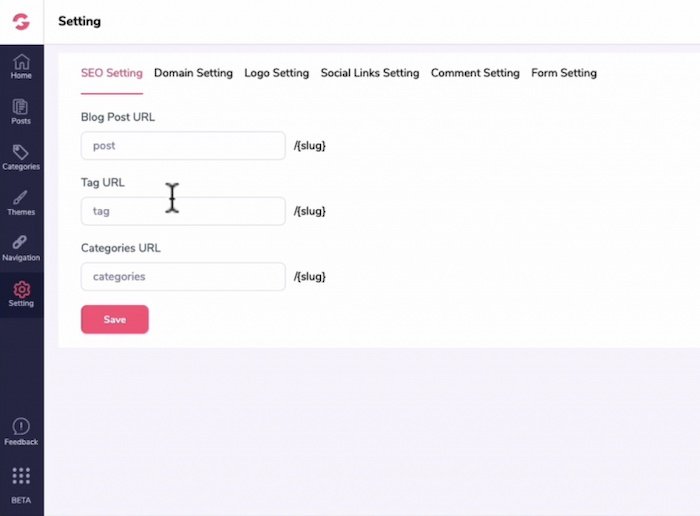
The Setting Tab
- Head to Settings on the left panel.
SEO settings
- This is the slug which the word that goes before the URL for the post’s tags and categories.
- For example, every time you create a post it will be a “blog name.groovblog.com/post/how-to-build-a-raised-garden-bed”
- I would prefer not to have the word “post” as a slug but it’s fine to leave these settings as is.
- Then click on Save.
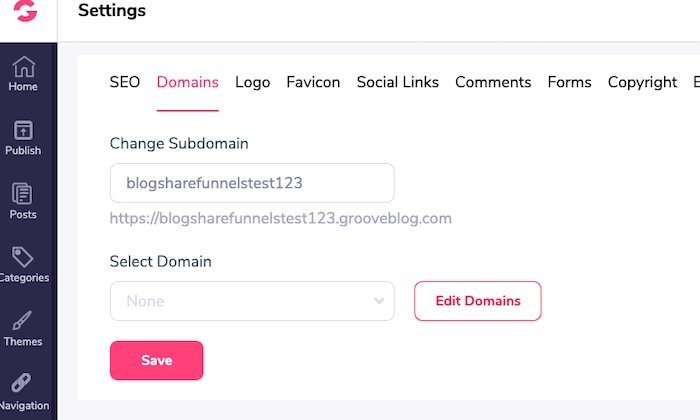
Domain settings
- You can change your subdomain of your GrooveBlog.
- Under “Select Domain”, you can add a branded custom domain to GrooveBlog.
Logo Settings
GrooveBlog will automatically resize its height to 30 pixels or so for you.
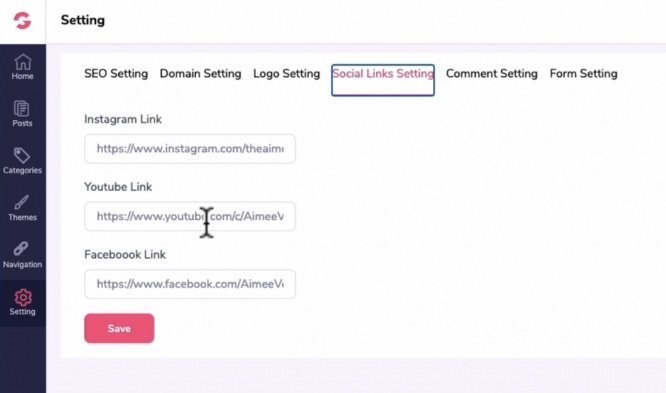
Social Links Settings
- Enter in the full URL for your Instagram, Youtube, and Facebook.
- I’m sure they will add more options for other social media profiles at a later date.
Comment Settings
- For now, it’s mainly for enabling Facebook comments in your post.
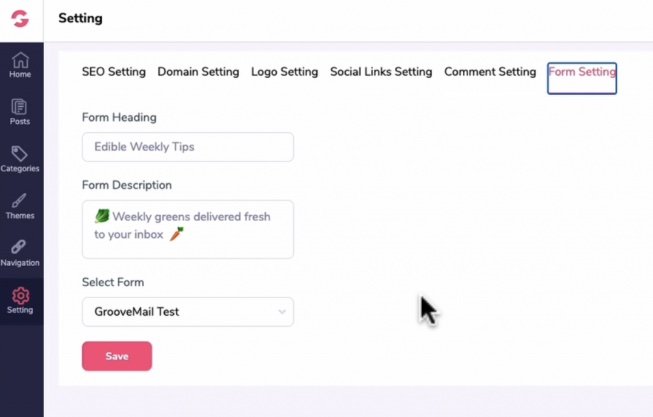
Form Setting
- This appears as a sidebar opt-in form and it’s tied to GrooveMail.
- If you don’t know what GrooveMail is or you don’t know how to make GrooveMail work for you then check out my GrooveMail Part 1 and Part 2 on my Youtube Channel.
- For the form heading, you can just change the title and the description.
- Select the form that you created in GrooveMail, and press save.
Monetize Your Blog With Ads
- If you wish to monetize your blogs from ads, there is a slot to add your ad tracking codes
Tracking & Pixels Settings
- Any ads or analytics tracking you like to add to GrooveBlog can be added in Tracking & Pixels settings
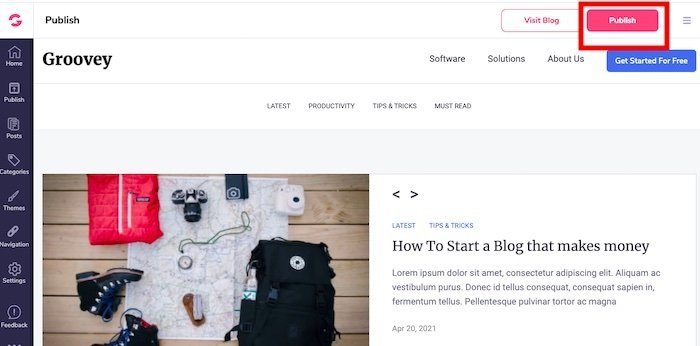
Publishing GrooveBlog Live
Once you’e done with your GrooveBlog and happy with the way it looks, it’s time to make it live.
- Click on https://app.groovefunnels.com/grooveblog/publish
- and hit the publish button to make your blog live
GrooveBlog Vs WordPress?
GrooveBlog is fairly new and doesn’t have the advanced features of WordPress
If you have an existing WordPress blog hosted on your domain name…
That has a lot of backlinks with pages ranking on Google, HOLD OFF on this because GrooveBlog is fairly basic right now.
There is no import tool from WordPress to GrooveBlog and it doesn’t have any advanced SEO features (or plugins)
If you’re just starting a brand new blog and you want something lightweight and minimal…
Then it’s worth giving GrooveBlog a go as as they will eventually have the custom domain feature in place.
What I’d like to see more in the future with GrooveBlog is…
- More SEO functionality,
- Integration with Google Analytics, Google Search Console,
- Site maps,
- Rich snippets,
- Tag management, and
- Sharing on other platforms like Pinterest.
Want To Get More Clicks To Your Blog Posts?
I recommend using CUSTOM graphics instead of stock photos on your social media posts .
You NEED unique custom 3d mockups, book covers, lead magnet images, online course mockups and funnel graphics to get people’s attention.
I’ve always struggled with design and could not justify hiring expensive graphic designers.
Not anymore.
The banner below was created WITHOUT any design skills and under 60 seconds.
Just point-and-click, drag-and-drop, then export!
Click the banner to learn how you can create stunning 3D digital product mockups, social media graphics and funnel graphics without any design skills.